
Source: Reddit / iriemeditation

Source: Reddit / iriemeditation

When I moved into my new office this spring, I decided that I needed to make this space less sterile. The easiest way to make an office warm and personal is to hang up art pieces. The process of framing art has always been expensive and tedious. I did some research on framing options and found Framebridge. This is a review of my experience after having four pieces framed at this e-commerce site. Framebridge.com launched in 2014 by Susan Tynan, CEO, to “to make it easy for everyone to frame the things they love.”
The process to get your art framed is as followed:

The pricing is based on certain size and includes free delivery.

There are currently 37 frame options available. Instead of glass, Framebridge uses high quality acrylic.
Timeline:

My experience overall have been very positive. I started with a small poster (9” x 12”). I uploaded the art and chose the Irvine Slim with no mat. The item came promptly. I paid $69 ($79 standard price with $10 off coupon for new client) and included free shipping.

I then went ahead and had another custom art framed. This time the piece was medium in size and priced at $99. I used the design service which gave me a few options and I ended up with the Irvine in black. That piece also came timely.

My third experience was shipping the art (14″ x 11″ artwork size) to the studio. Somehow my photograph got creased on the way to the studio. Framebridge than promptly notified me of the issue and discussed options on how to proceed. I was able to get an image of the photograph from the UK photographer and then I uploaded it to the site. Framebridge sent my original photograph back and then sent me the framed art. The only issue was that the art was cropped in a way that the photograph and frame is smaller than what I had ordered. I brought up this issue with Framebridge and we resolved it by having the image crop to the size of my original photograph. I had to send back the framed art (wrong size) to the company. Framebridge should have notified me of the sizing issue of the image and ask how to proceed before making the executive decision the first time. It would have saved time and effort.

The fourth experience was for me to upload a photograph of my family and have it framed and shipped to my mother for Mother’s Day. The art came without incident. It appears that uploading the image is the best way to go.
The frames that I received are of high quality and the convenience match the prices. I also chose modern and simple frames. If the framing is for smaller art work or photos, it may be more cost effective to buy a pre-made frame at a store. If you have art that you want to show case and it comes in a nonstandard size, this is a great option. I ultimate paid for the convenience and I am happy with the deliverable. I would also stick to uploading images for print. I don’t know if I would have the confidence to ship very expensive art to a studio to frame it.
For related posts, visit our DESIGN page.
Photos courtesy of Framebridge.com

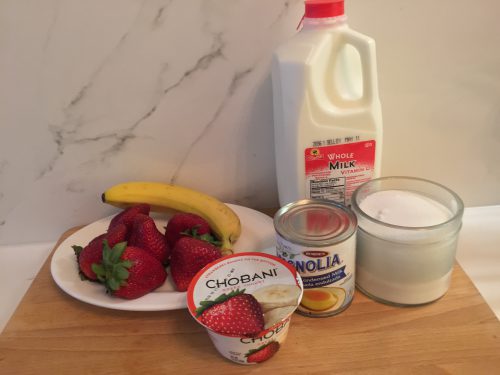
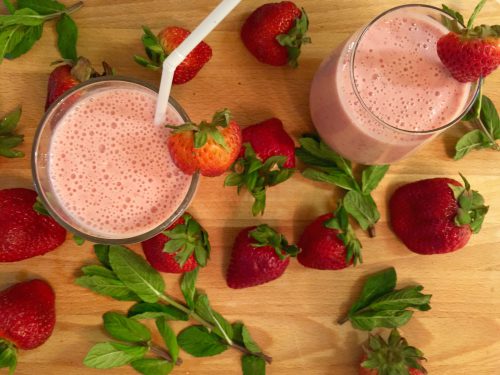
Summer is when strawberries are in season and are abundant at any farmer’s market. A great way to serve strawberries is our delicious strawberry and banana shake or sinh tố dâu chuối. This is my mom’s recipe for a delightful afternoon treat.
6 large strawberries
1 banana
1 5.3oz lowfat yogurt (we used chobani greek yogurt with strawberry and banana)
1 tablespoon of condense milk
1 tablespoon of sugar
¼ cup of milk
1 cup of ice
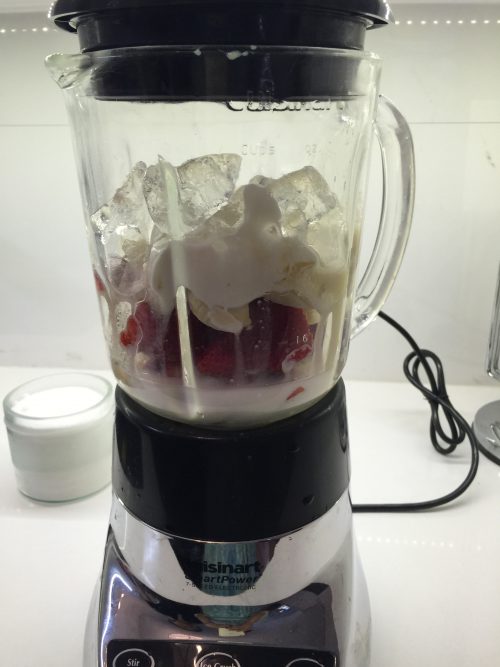
Combined all the ingredients into a blender and blend until you have a smooth consistency.
For more recipes, visit our EAT page or Recipe Index.

Source: Reddit / fuzzybreeze

Over the past few years, airlines have created the premium economy class to meet the demands of its customers for a class between cramped economy and expensive business. This premium class is offered on international flights due to generally long distances traveled and customers’ desire for little bit more leg room. Air France is one carrier that recently revamped its premium economy class and we tested the offer on our recent trip from New York to Portugal.
Flight: Premium Economy from NY JFK connecting at Paris-CDG airport with the final destination arriving in Lisbon on Boeing 777-300ER.
Lounge Access: None. Non-business passengers do not have lounge access.
Priority Line: Premium class customers have Sky Priority access which really is the only perk to the economy premium class. Sky Priority is reserved for Premium, Business and First class customers. You will enter through the expedited passport, customs and boarding line. Sky Priority is worth it if you have a connecting flight in Paris. The passport and security line is very short for Sky Priority which is necessary for going from the arrival terminal to the connecting terminal for inter-Europe flight. Charles De Gaulle Airport can be a maze and requires a lot of walking to get to your connecting flight. We saw only two passport control windows open (1 for Economy and 1 for Sky Priority) at passport control. The economy line was very long and slow. People were frustrated by the long line as they needed to get to their connecting flight.
Luggage: AF luggage maximum for hand luggage (carry on + personal) is 35lb. No one checks your carryon bag weight like they do in Economy. Premium Economy luggage has Priority tags so that you can get your luggage first. However, my Priority luggage came out last in Lisbon while the other Priority luggage came out first, almost making me wonder if I got the famous AF’s lost luggage service.
Food: Premium economy class is slightly better than Economy on the international flight. For my flight from JFK to CDG, we were served marinated shrimp and scallops on a bed of ratatouille with either chicken with mild spicy red curry, jasmine rice with vegetables and Japanese furikake garnish or shell pasta with lobster sauce and vegetables. The chicken was average and my companion had the shell pasta which turned out to be “mushy”. Wine was offered, but beyond that there are no additional services.
Seat: The Premium Economy seat’s distance to the seat in front of you is narrow by international standards. The seat recline angle is also awkward and uncomfortable for a premium seat. Even though it is a nice “shell” seat, the seat is done in a way that it only slides out a little bit. This is just enough to put your feet up but not enough so you can recline comfortably. Passenger ends up in this awkward half recline that puts pressure on your lower back. I’m comparing this to the JAL Premium Economy seat that has enough space that allows for a deeper recline which lessens the pressure on your back. JAL’s width is wide enough that the recline feels comparable to a lazy boy seat.
The marketing version:
Reality:
Amenities: The AF premium kit is very basic. You get a cute little bag with ear plugs, tooth bush, tooth paste and eye mask. It’s the same as what you would have received in Economy class several years ago.

Price: AF Premium upgrade from economy depends on when you book it. My one-way Premium upgrade was approximately $300. The flight from CDG to Lisbon was on a smaller jet so I only got a better economy seat on the plane. The Sky Priority to get through custom with a 1.5 hour layover was just enough to get onto my next flight.
Overall Rating: Average
Even though AF markets the airlines as the classier and chicer European airline, the overall experience has been average. If you can get the premium upgrade for less than a few hundred dollars on a long international flight, then it is worthwhile just to have the Sky Priority privilege to help with the shorter lines. Otherwise, save your money elsewhere.
Featured Photo: Air France
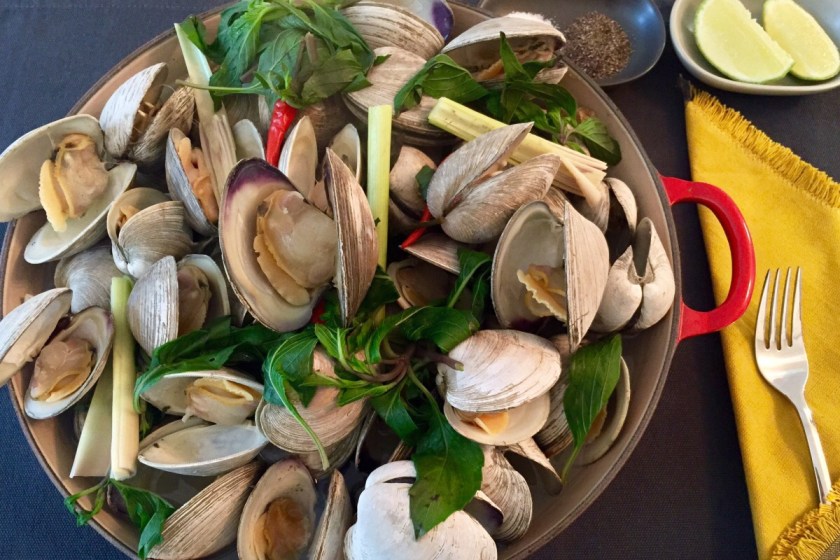
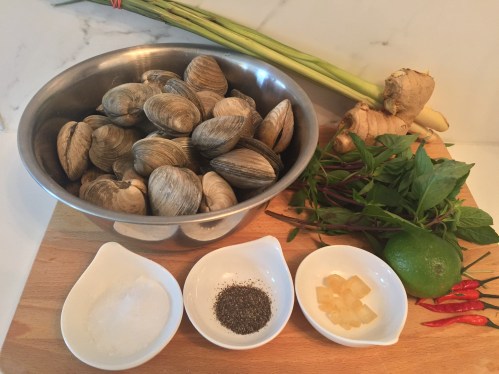
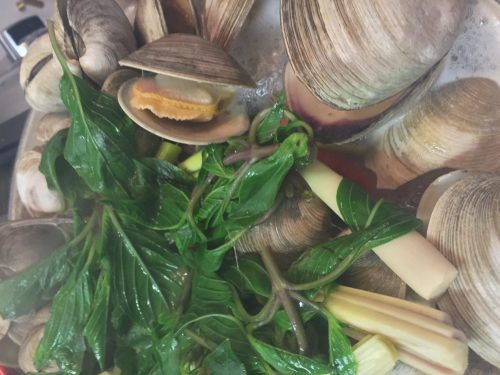
When summer comes around, I automatically think of all the good seafood that are available. One very simple and fragrant dish that can serve a crowd is the classic steamed clams with lemongrass, Thai basil and ginger. The clams are then dipped into a a mixture of salt, pepper and lime juice. This dish is an easy summer delight for those nights when you do not want to cook over a hot stove for hours.
This recipe is rated easy and takes 30 minutes.
50 Littleneck clams
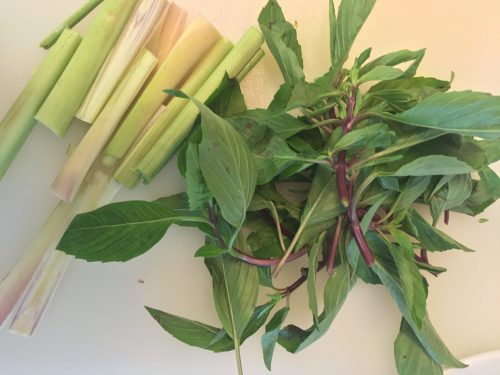
4 Stalks of lemongrass
1 very large ginger
1 Tablespoon of rock sugar
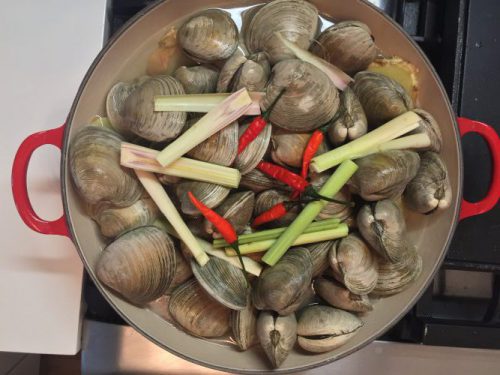
A few red Thai chili for a hint of spice
5-6 stalks of Thai basil
1 Lime
Salt and ground pepper for the dipping sauce
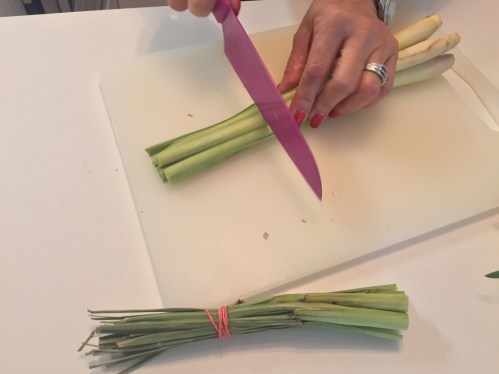
Cut the lemongrass stalks into 3 parts and discard the thin ends (shown tied with a rubber band).
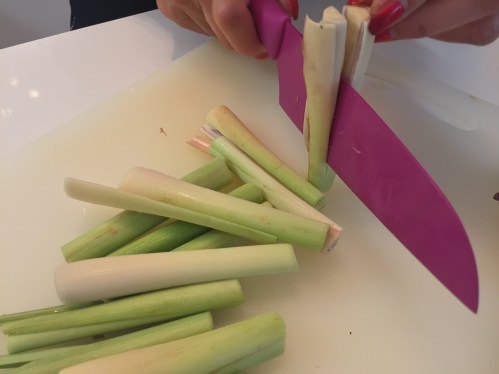
Split the thick white part of the lemongrass in half.
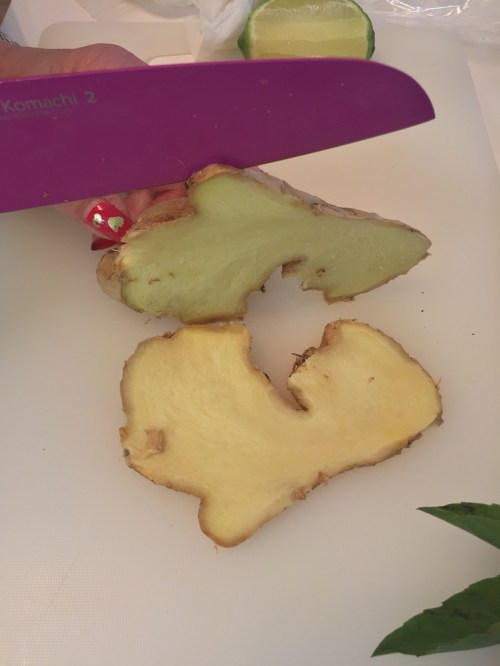
Cut the ginger into thick slices.
Break the basil into 3 pieces and discard the ends.
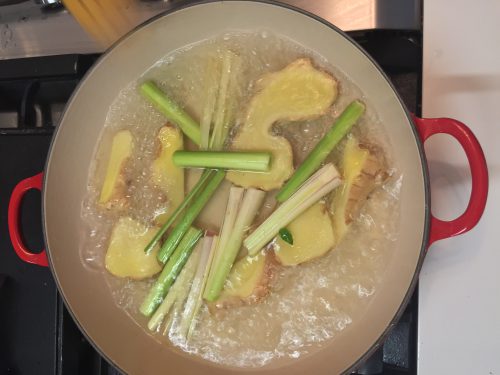
In a large and deep pan, boil 3 cups of water, ginger slices, 1 tablespoon of rock sugar and half of the lemongrass stalks for at least 15 minutes with the cover on. This will allow enough time for the lemongrass and ginger to release their flavors. Add more water to get to the same water line (3 cups) if too much water has evaporated.
Add the clams and add the remaining lemongrass to the top and close the lid for approximately 5 minutes.
After 5 minutes, add the Thai basil and close the lid. The clams should be cook within the next few minutes.
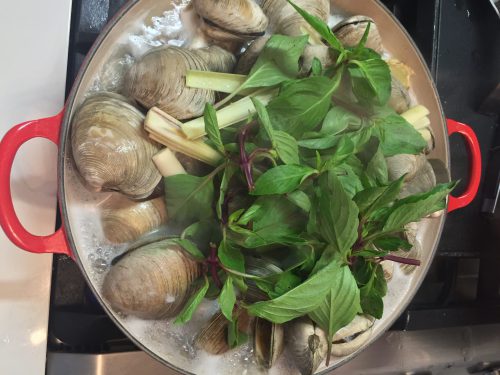
When the clams starts to open (takes a few minutes), remove from the heat.
Serve the clams with the a mixture of salt, ground pepper and enough lime juice to wet the mixture.

For more recipes, visit our EAT page or Recipe Index.

Source: Unknown

Source: Reddit/ minightmoose
On a recent trip to Asia, I decided to have a 12 hours layover in Narita to explore the city. Narita Airport is at least 40 minutes on a train from Tokyo while Narita city is only a 10 minutes train ride away. Narita city is not about the sights as there are few things to see. However the city boast an abundance of charm and a good way to observe everyday Japanese’s lives for a short duration. Narita is known for grilled eel or unagi and that is where my senses led me. I was fortunate to have a friend residing in Japan meet me in Narita for a short sight seeing break. This is the breakdown of my adventure in Narita.
I had Japan Airlines’ Sakura Lounge access so I was able to freshen up after a red eye flight and grab a quick bite in the lounge. I stored my luggage at the lounge but there are locker options at the arrival hall as well. You can inquire about the locker option at the information desk. Make sure you have your passport with you as you will need it to re-enter the airport. You will need to go through customs and exit the international airport. If you have a premium ticket, you will get to go through an expedited custom and passport line which makes the process much easier.
First, I withdrew some Japanese Yen as the train kiosk only accepts cash and most small vendors do not accept cards. I exchanged my USD currency at the kisok below on my way to the train terminal.

The best way to get to to Narita is to take the train. I looked for the signage for the Keisei Main Line and followed the signs.

I had some trouble buying my ticket at the machine for Narita but I was able to figure it out eventually. Tip: Look at the sign for Narita stop on the Keisei line and it will tell you how many Yen you need to put in the machine for the ticket. Japanese train ticket prices go by distance. The folks below are demonstrating that if all else fail, ask a fellow Japanese.


The red box indicate the airport station and then count the stops to Narita city. The red number by the stop is how many Yen one would need to pay for the ticket.
After I bought the ticket, I headed toward the gates which led to the train platform.

Once I arrived at the Keisei Narita station and met up with my friend, Joe, we made our way to Omotesando Street (the main street that runs through the town and takes you to the Naritasan temple).


It was a pleasant stroll down Omotesando Street and passing by local shops and people going about their day.


We passed numerous shops with mouthwatering snacks that tempted us to stop and sample the delicacies.


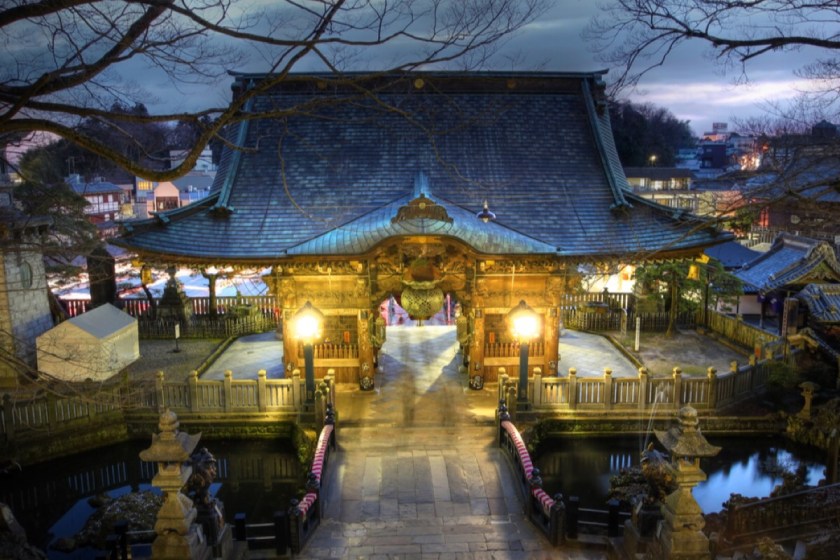
At the end of Omotesando, we arrived at the 1,000-year-old Naritasan temple. The temple complex is large but not unmanageable. We strolled around the temple, bought some prayers for our families as souvenirs and enjoyed the beautiful weather. Next to the temple is is Naritsan Park that would generally be filled with cherry blossoms or falling leaves.


Even around the temple, there were street food vendors that offered a variety of snacks.


After exploring the temple, we made our way back to Omotesando and toward the famous eel place. There are a few well known unagi places and you can see the preparation and grilling of the eel right on the street. You can not get eel fresher than that.


There were huge lines at the two famous unagi places. We ended up at Surugaya and had a 1.5 hour wait. We got a ticket for our place in line and headed to a nearby sushi place for the appetizers.

We made our way back to Surugaya after an hour only to miss our number. Apparently the wait was much shorter than what was indicated. Luckily for us, the hostess sat us anyway. As we made our way to the table, the smell of unagi started to make us hungry again.


After having the best unagi ever, we made our way back to the train station with 3 hours left before my flight departs for the US.

I was very happy to have a few hours in Narita and to sample a slice of Japanese life. If you have a few hours to spare while in Narita Airport, I highly recommend venturing into Narita city. Sometimes you just need a taste of fresh air and good Japanese food to get you through the next 14 hours on the plane.
For more articles, visit out TRAVEL page.
Featured photo: The Long Trip Home blog

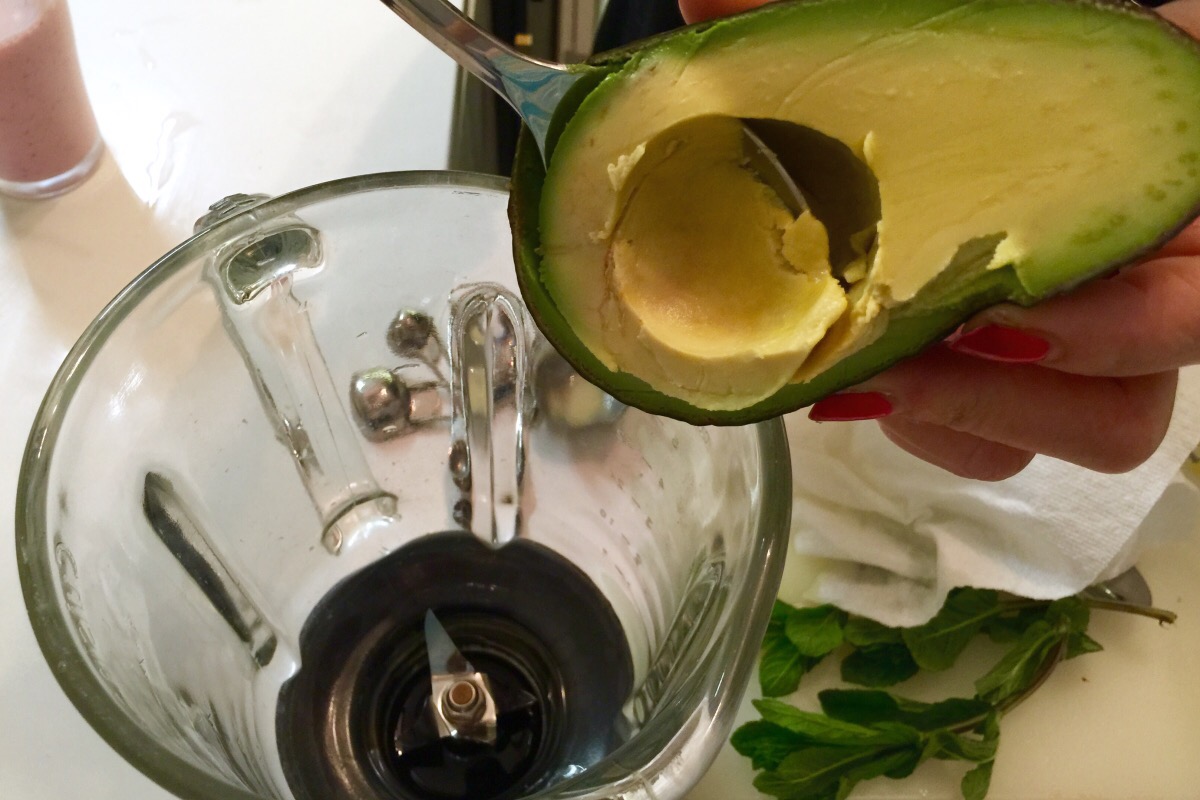
In Vietnam, avocados are used for sweet desserts and not savory dishes like the ones in the western world. Avocado shake literally translates to “butter fruit shake” in Vietnamese and that aptly describes this confection. Step into any Vietnamese restaurant and you’ll see avocado shake on the menu. This is not a healthy shake by any means due to the condense milk, but it is treat. This shake has a consistency of a light pudding so I have always considered this to be a dessert drink. On an interesting note, avocado was introduced by the French and given its name, trái bơ or butter fruit, due to the buttery richness of the flesh. Enjoy this wonderful shake anytime of the day.
2 Ripe Haas avocados
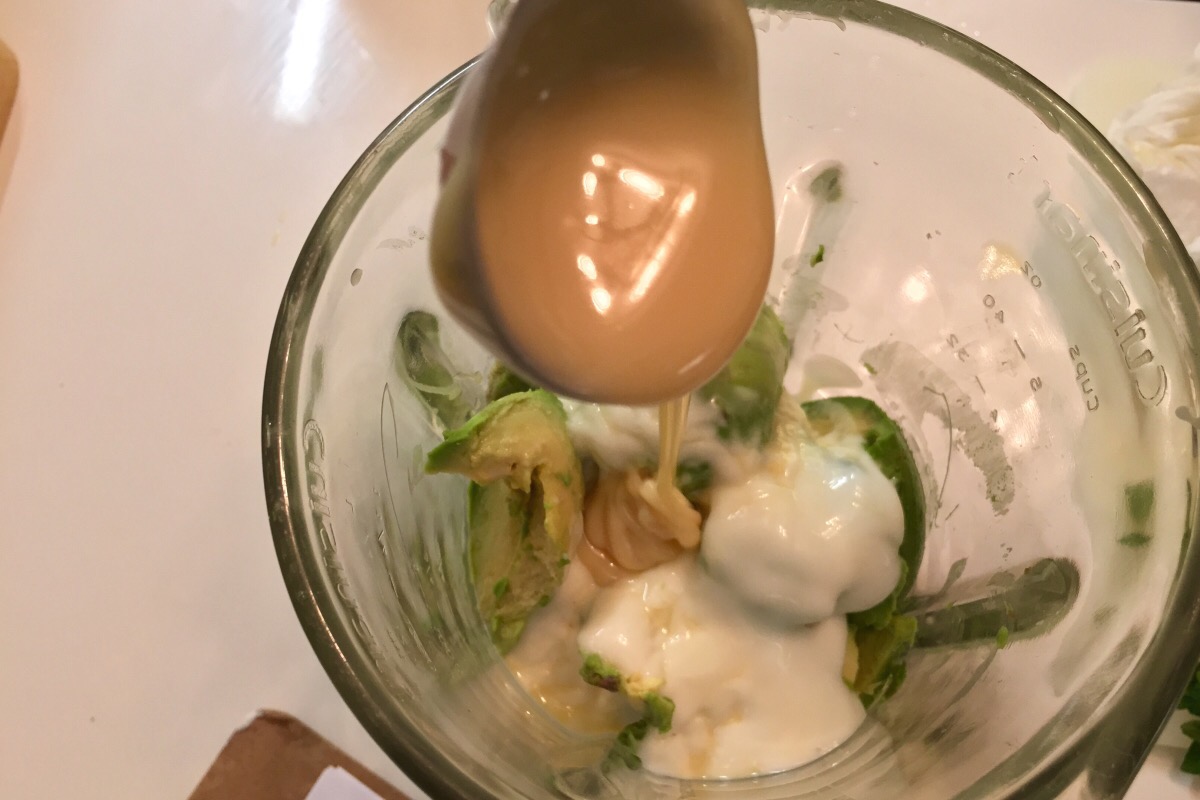
1/4 cup of vanilla yogurt
1/2 cup of milk
1 and 1/4 cup of ice
2 tablespoons of condense milk

Using a spoon, scoop out the avocado flesh into the blender.
Add yogurt, milk, ice and condense milk.
Blend until you have a smooth consistency.


For more recipes, visit our EAT page or Recipe Index.
