
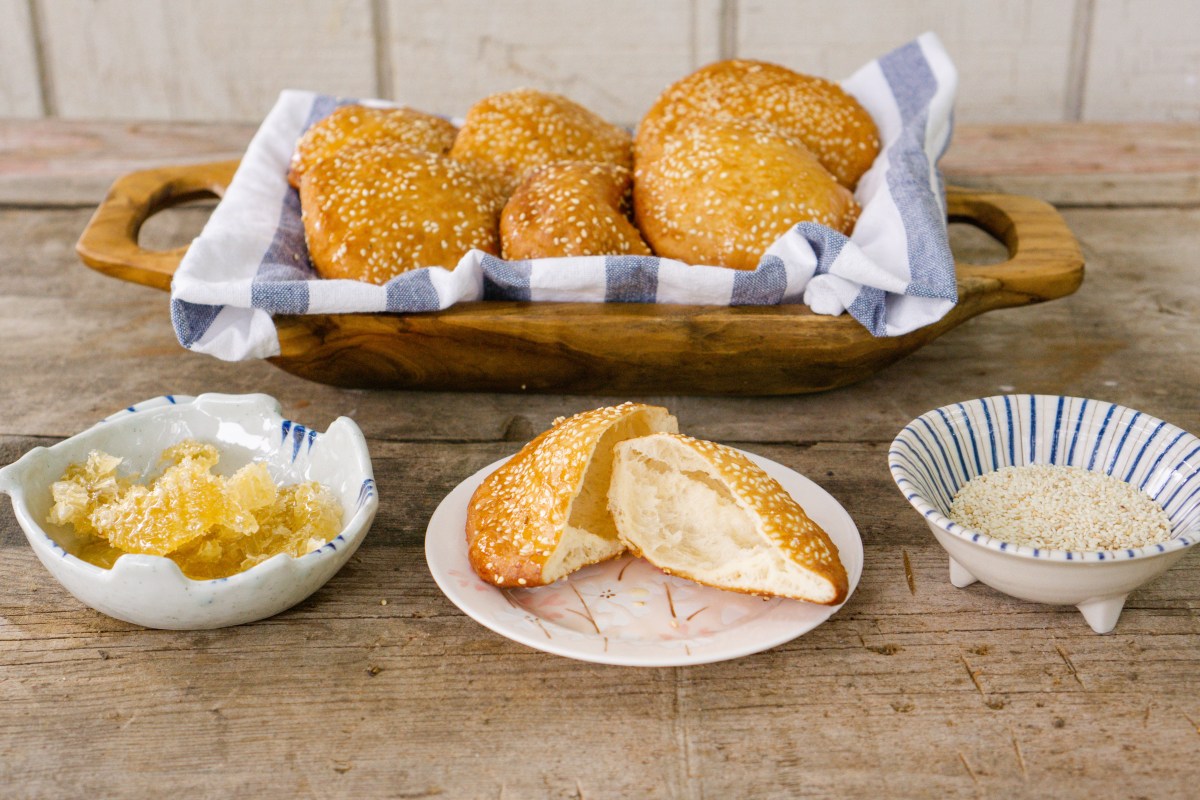
Bánh tiêu is essentially the Vietnamese version of fried dough or donut. One can find them sold throughout any town from street vendors. These donuts differ from American donuts due to bánh tiêu having a hollow center. This creates a light and fluffy donut with a chewy texture, which also has a light crunch from the sesame seeds.
To take this traditional hollow donut up a notch, I incorporated honey into the batter and also applied a light honey glaze. This version of bánh tiêu has just the right amount of sweetness that my family cannot get enough of.
This recipe makes 12 donuts and takes about 2 hours with proofing time.
Ingredients:
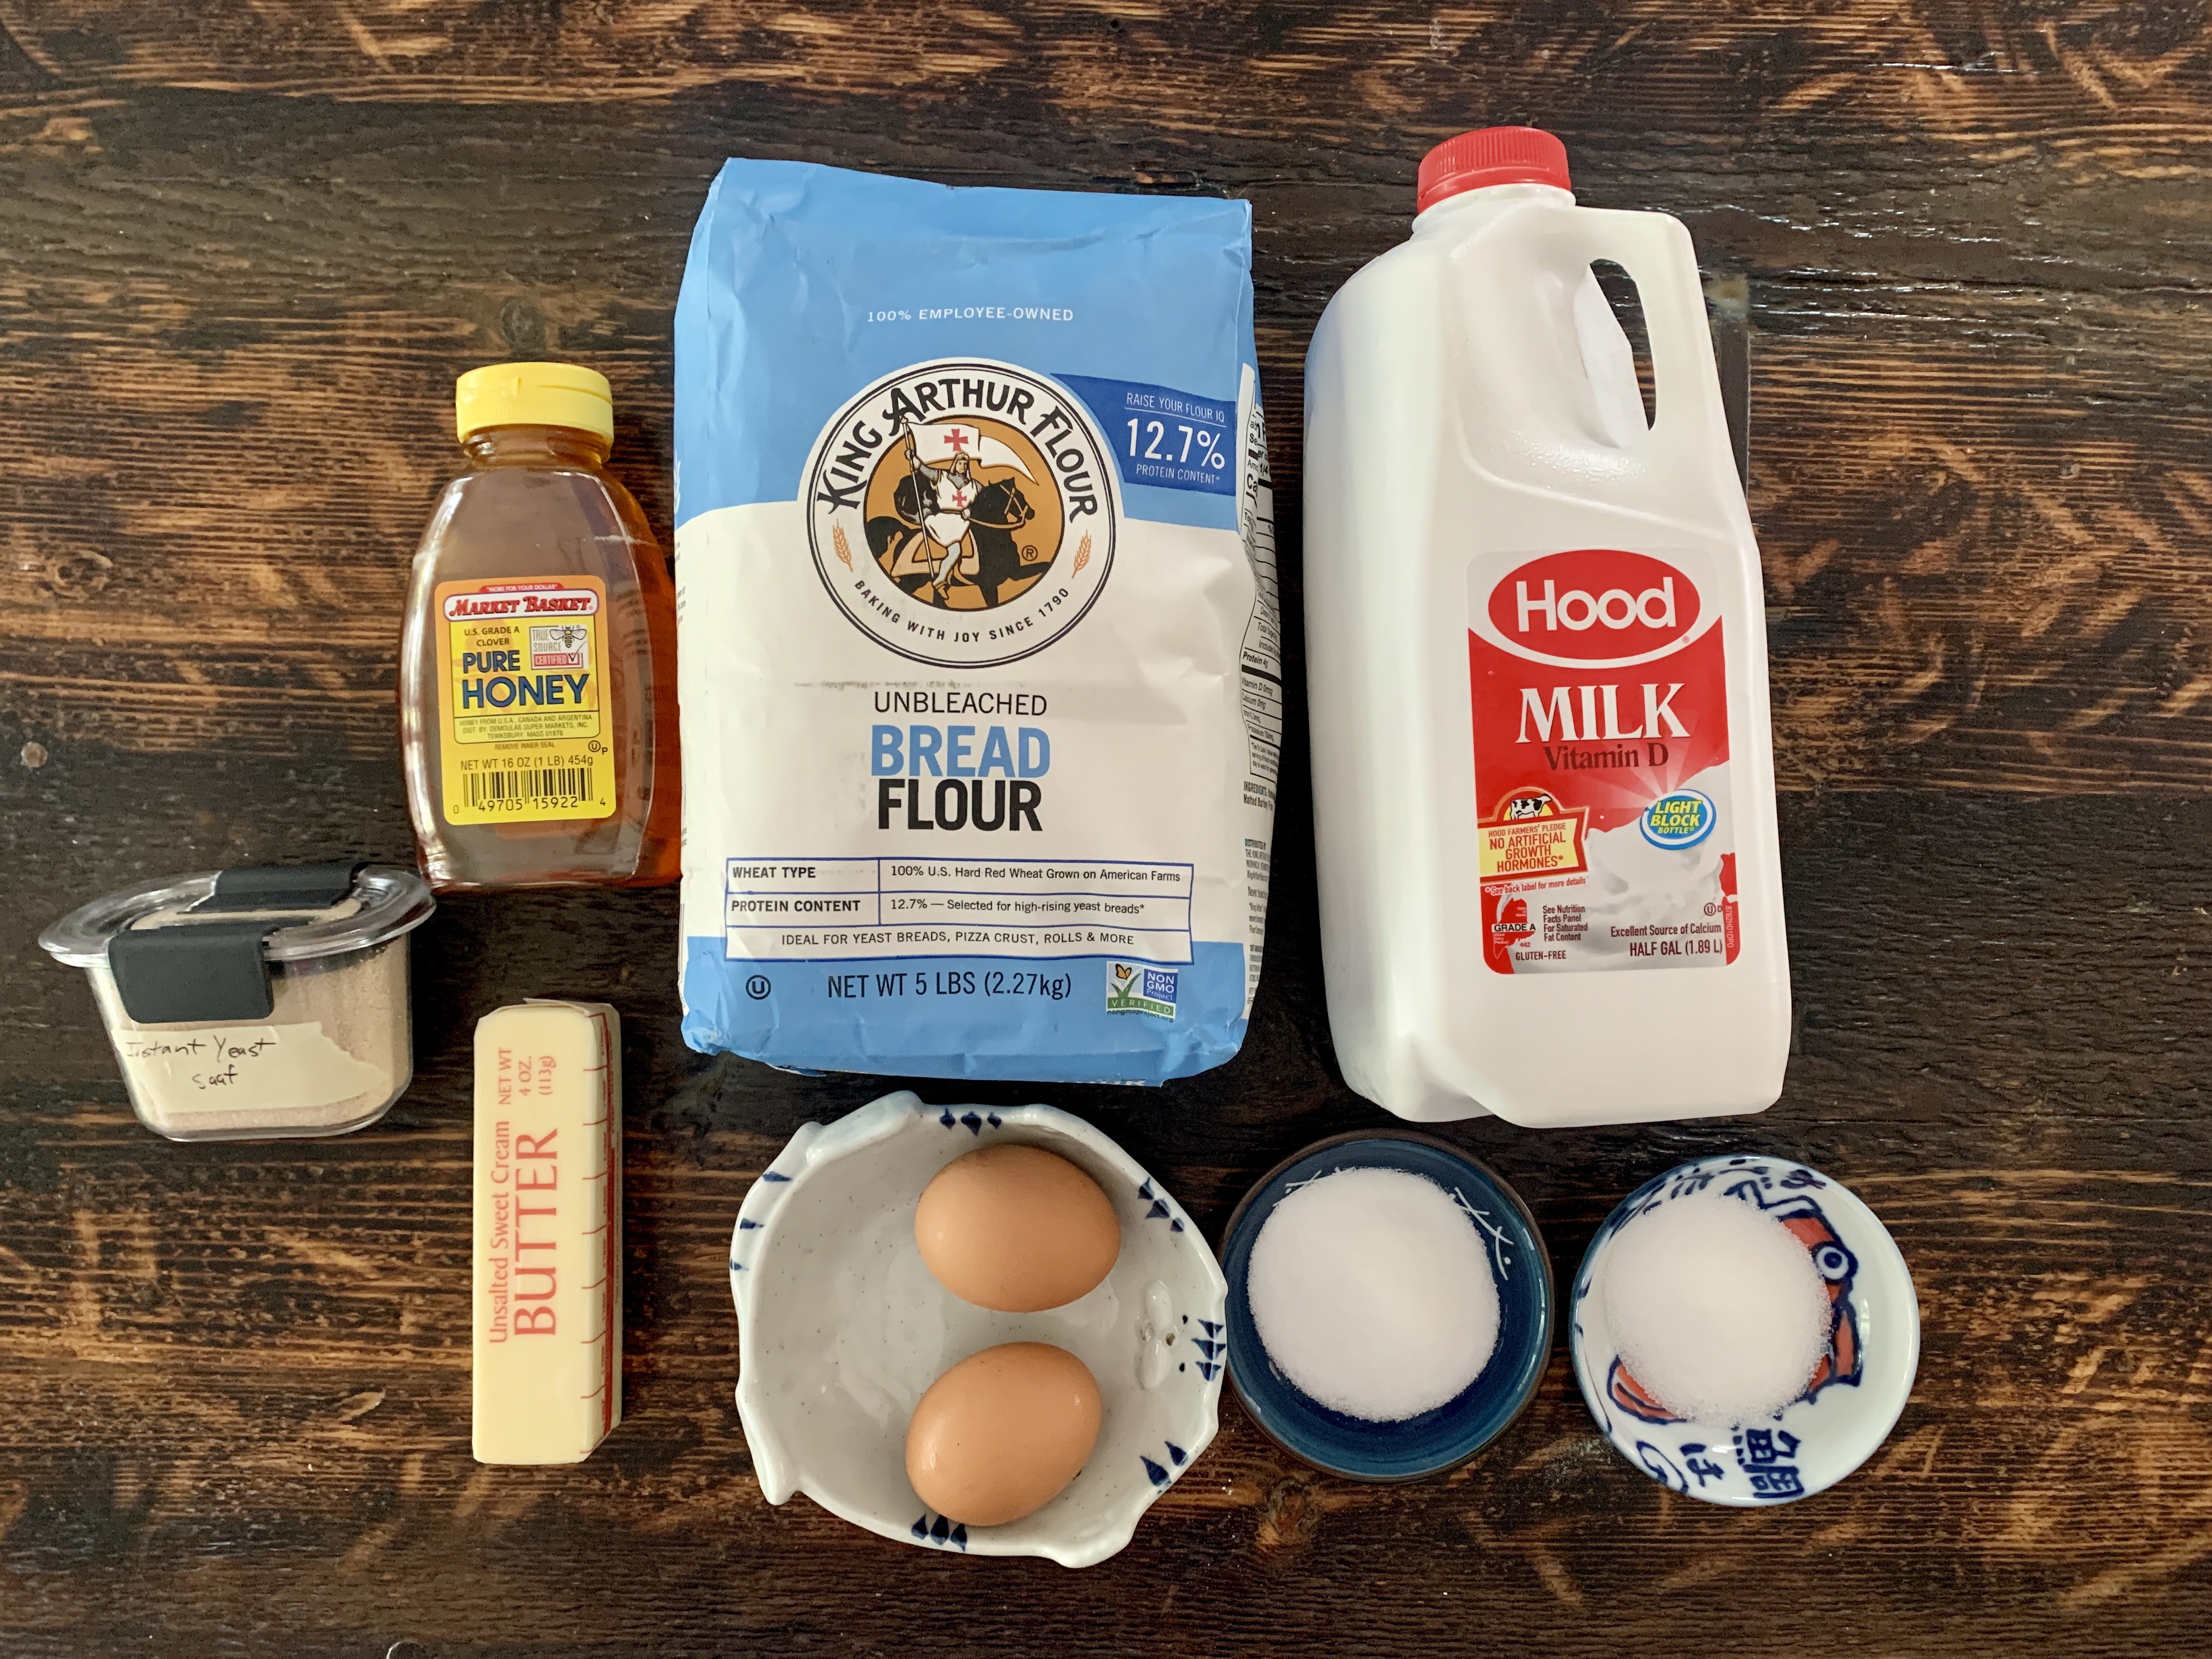
2 and 3/4 cup of bread flour / 400 gram
1/2 cup of water
1/2 cup of 1% low-fat milk
3 tablespoons of sugar
1 and 1/4 teaspoon of salt
1 packet of vanilla sugar or 1 teaspoon of vanilla extract
1 teaspoon of instant yeast
1 teaspoon of baking powder
1/2 cup of sesame seeds
2 tablespoons of honey
Honey glaze (1/4 cup of honey + 1-2 teaspoons of water to dilute until honey is manageable with a brush. Use more or less honey according to your preference.)
Approximately 1 quart of vegetable oil for deep frying
Neutral cooking spray like PAM
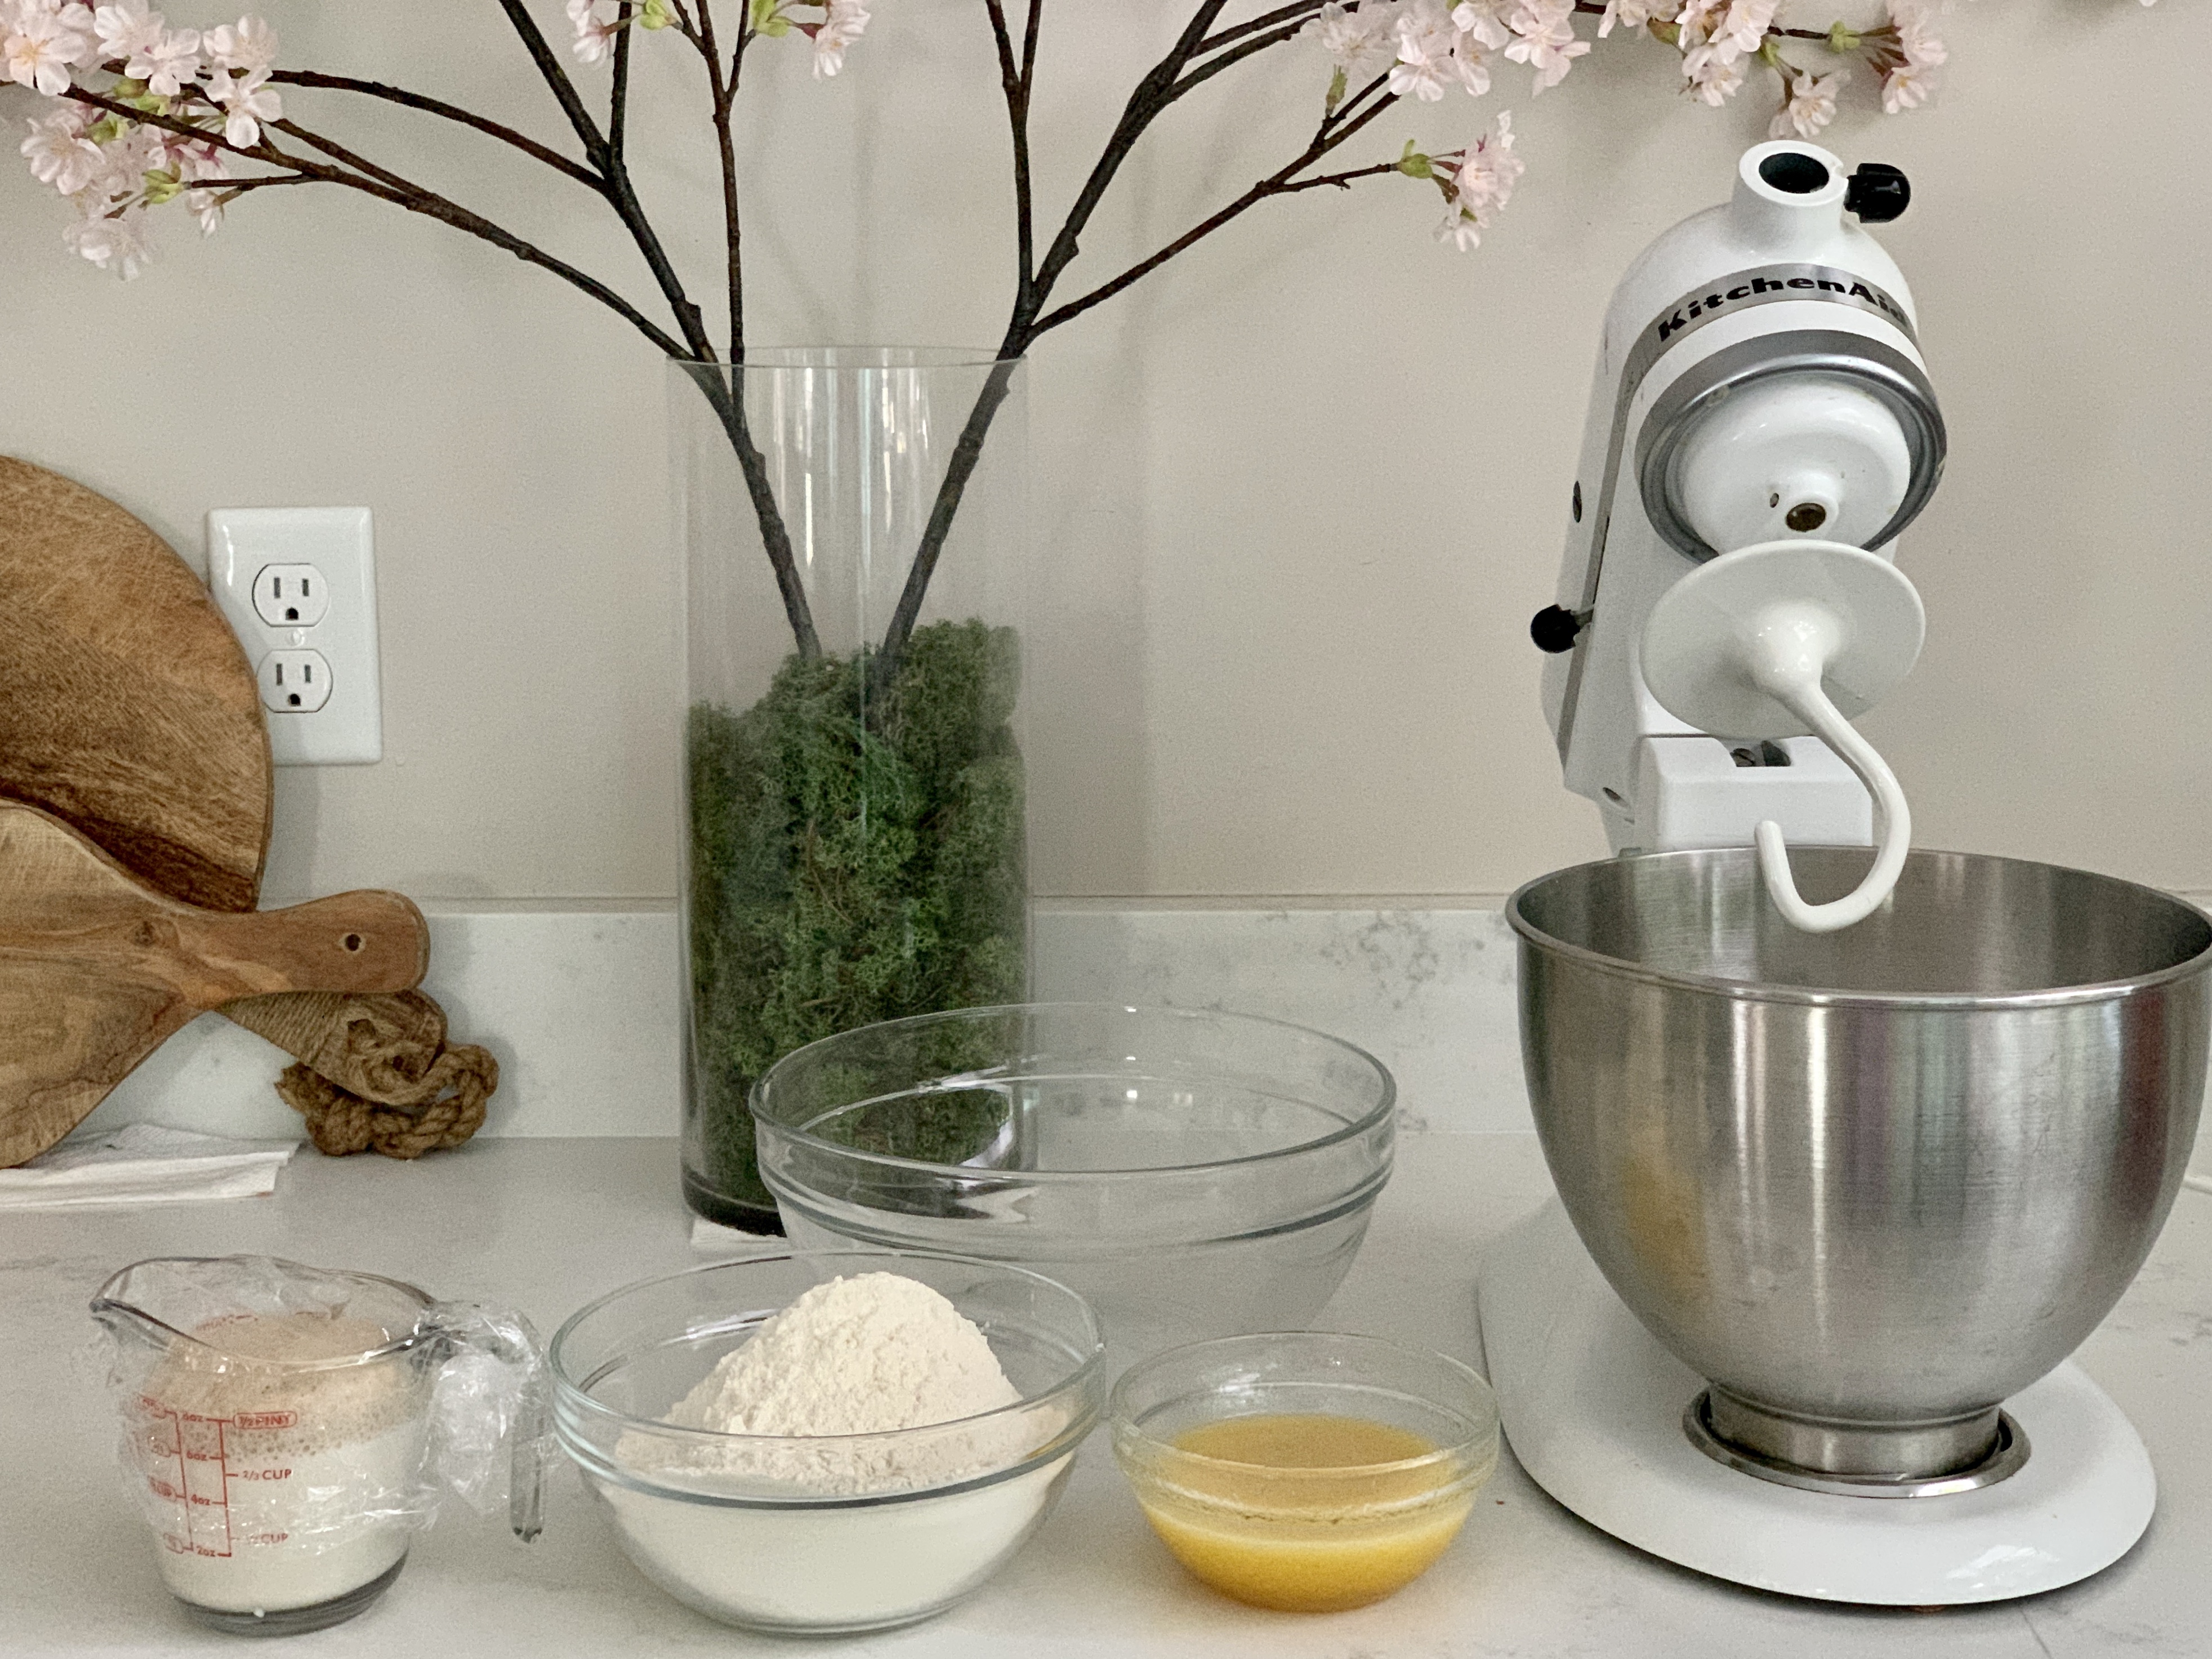
Equipment: Stand mixer or hand mixer. You can also knead by hand. It just takes a lot more effort.

Directions:
Mix 1/2 cup of milk with 1/2 cup of water and microwave for 30 seconds. The temperature should be lukewarm.
Add 1 tablespoon of sugar and 1 teaspoon of instant yeast to the milk mixture. Cover with plastic and set aside for 5 minutes. (Instant yeast does not need to be activated but I find that you get the best results this way.) You should see some foaming from the yeast after a few minutes.


In a mixing bowl, add 2 and 3/4 cup of bread flour, 2 tablespoons of sugar, 1 packet of vanilla sugar, 1 teaspoon of baking powder, and 1 and 1/4 teaspoons of salt. Mix to incorporate all the ingredients.

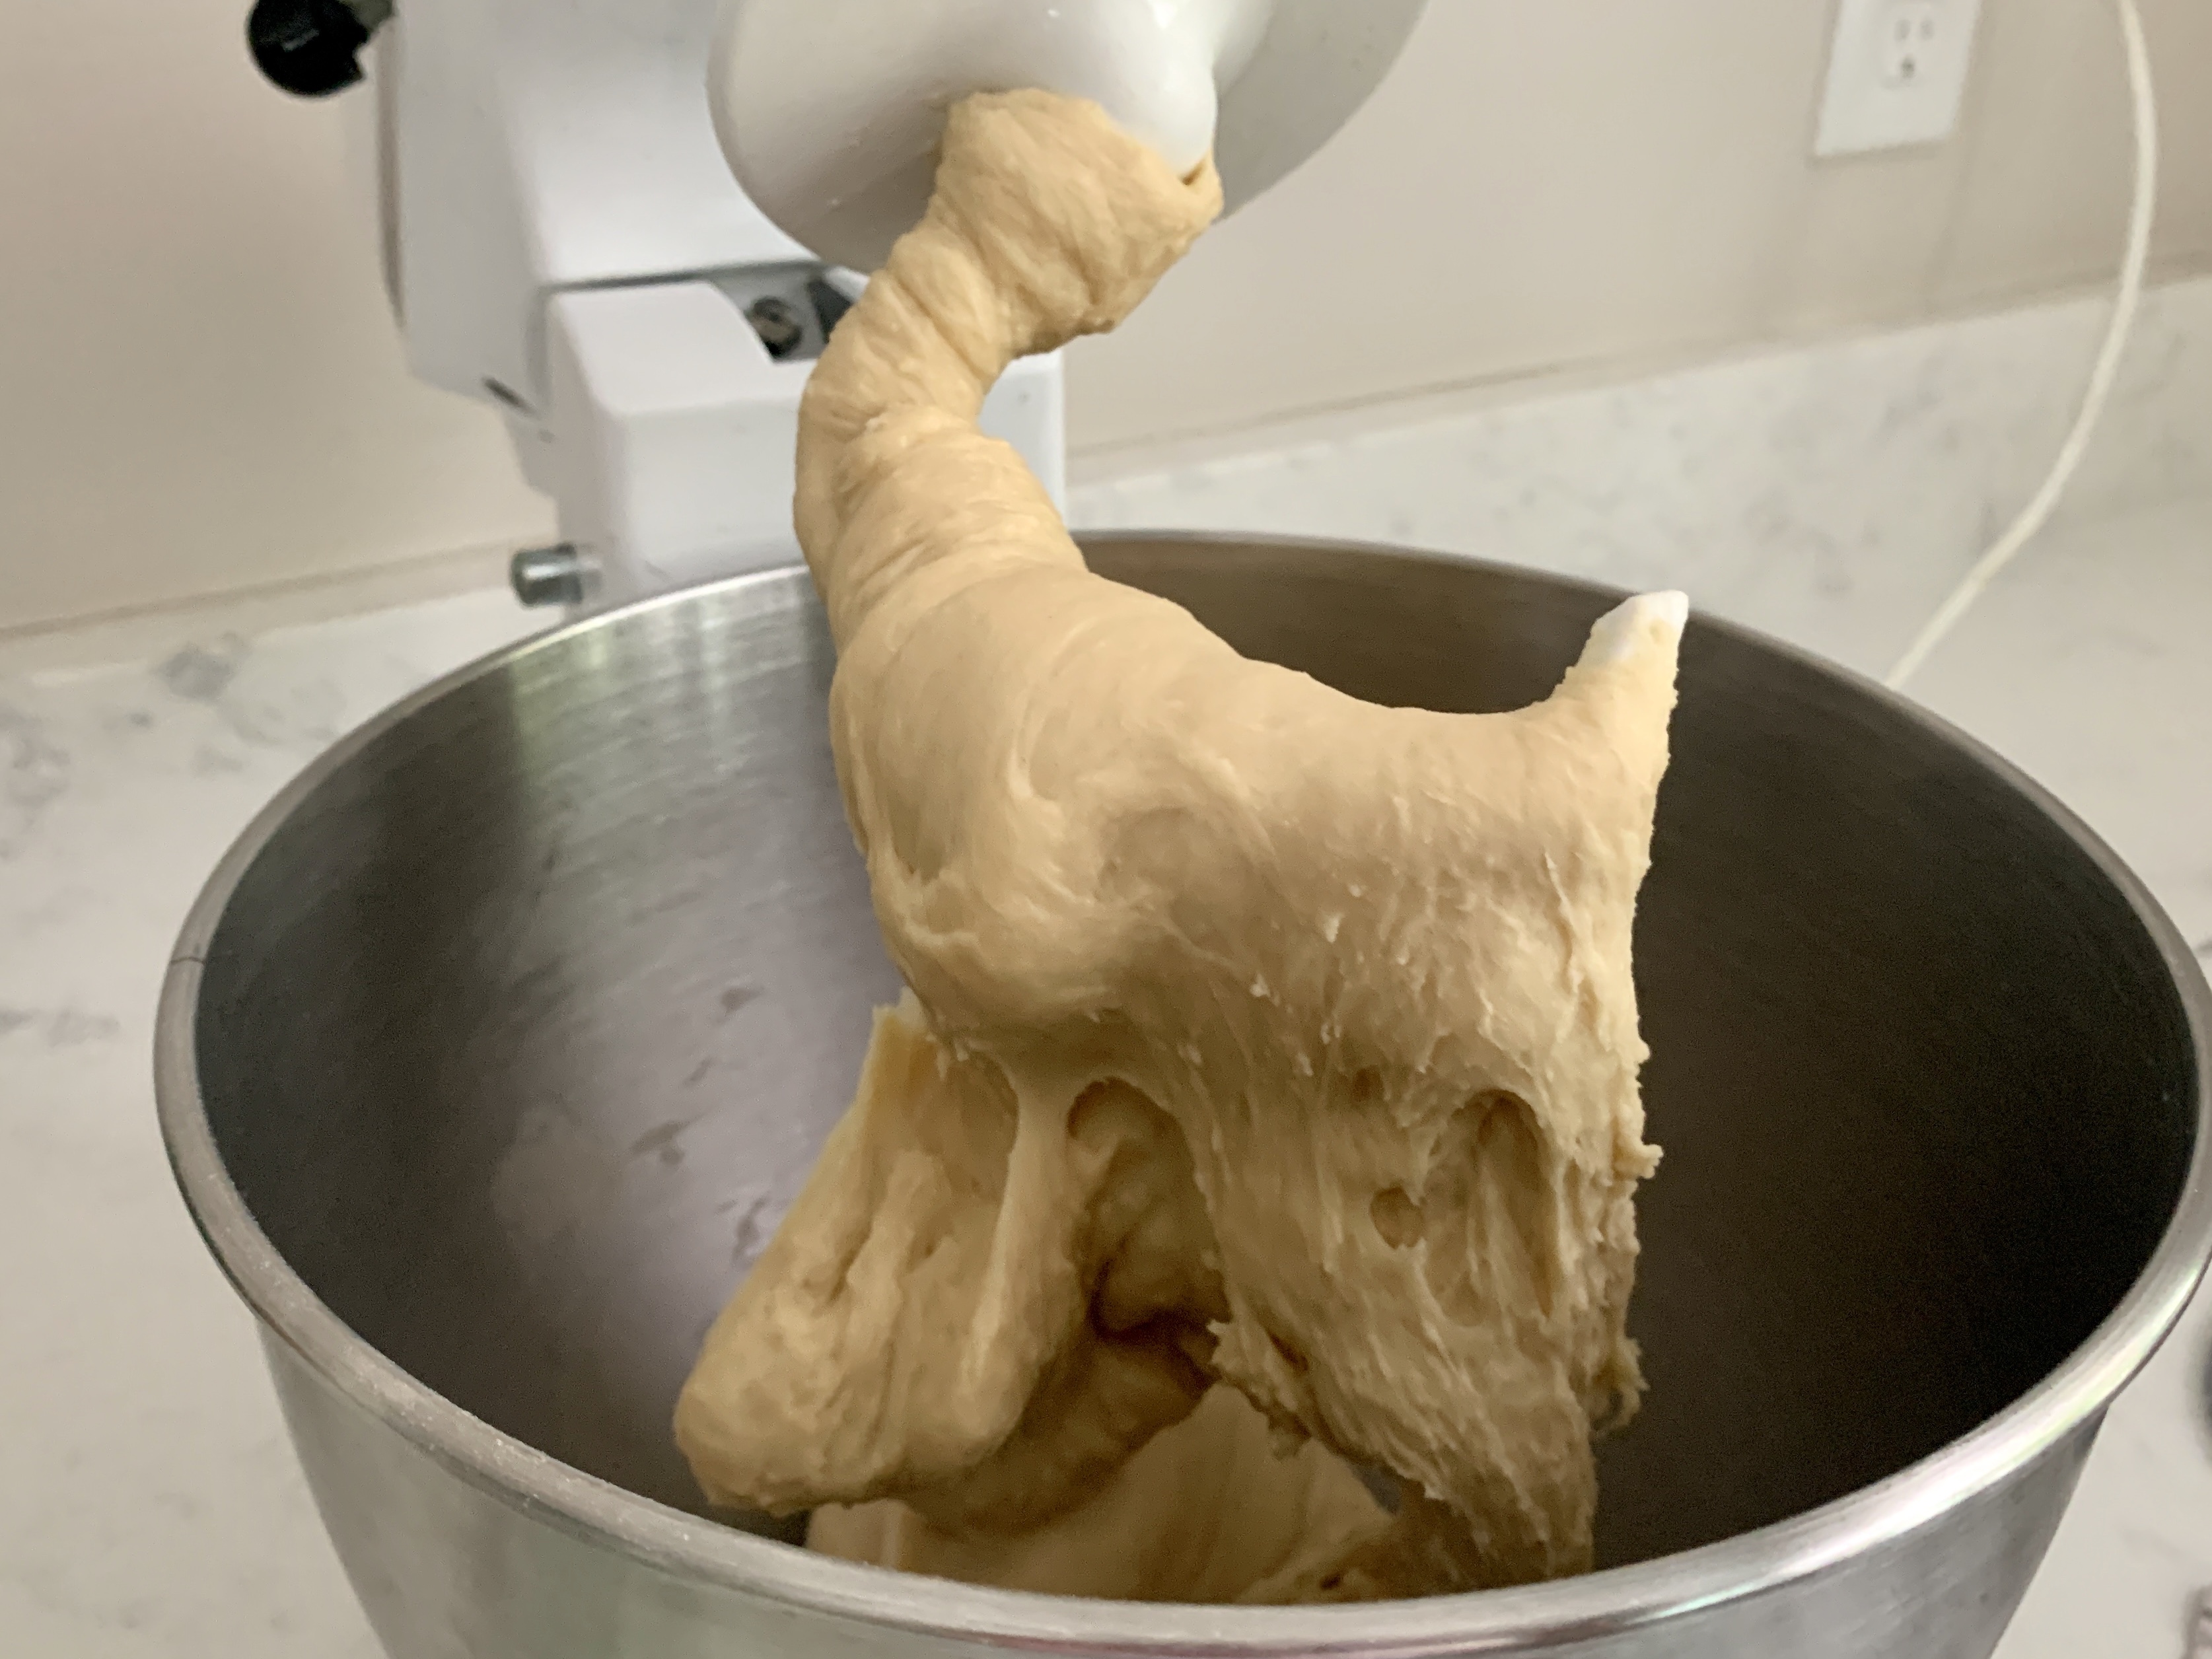
Using a standard mixer with a dough hook, put the setting on stir or #2 for Kitchenaid stand mixer. Slowly add the milk and yeast mixture to the flour until it is fully incorporated into the dough.
Add 2 tablespoons of honey to the dough as it continues to stir. This all takes about 2-3 minutes.

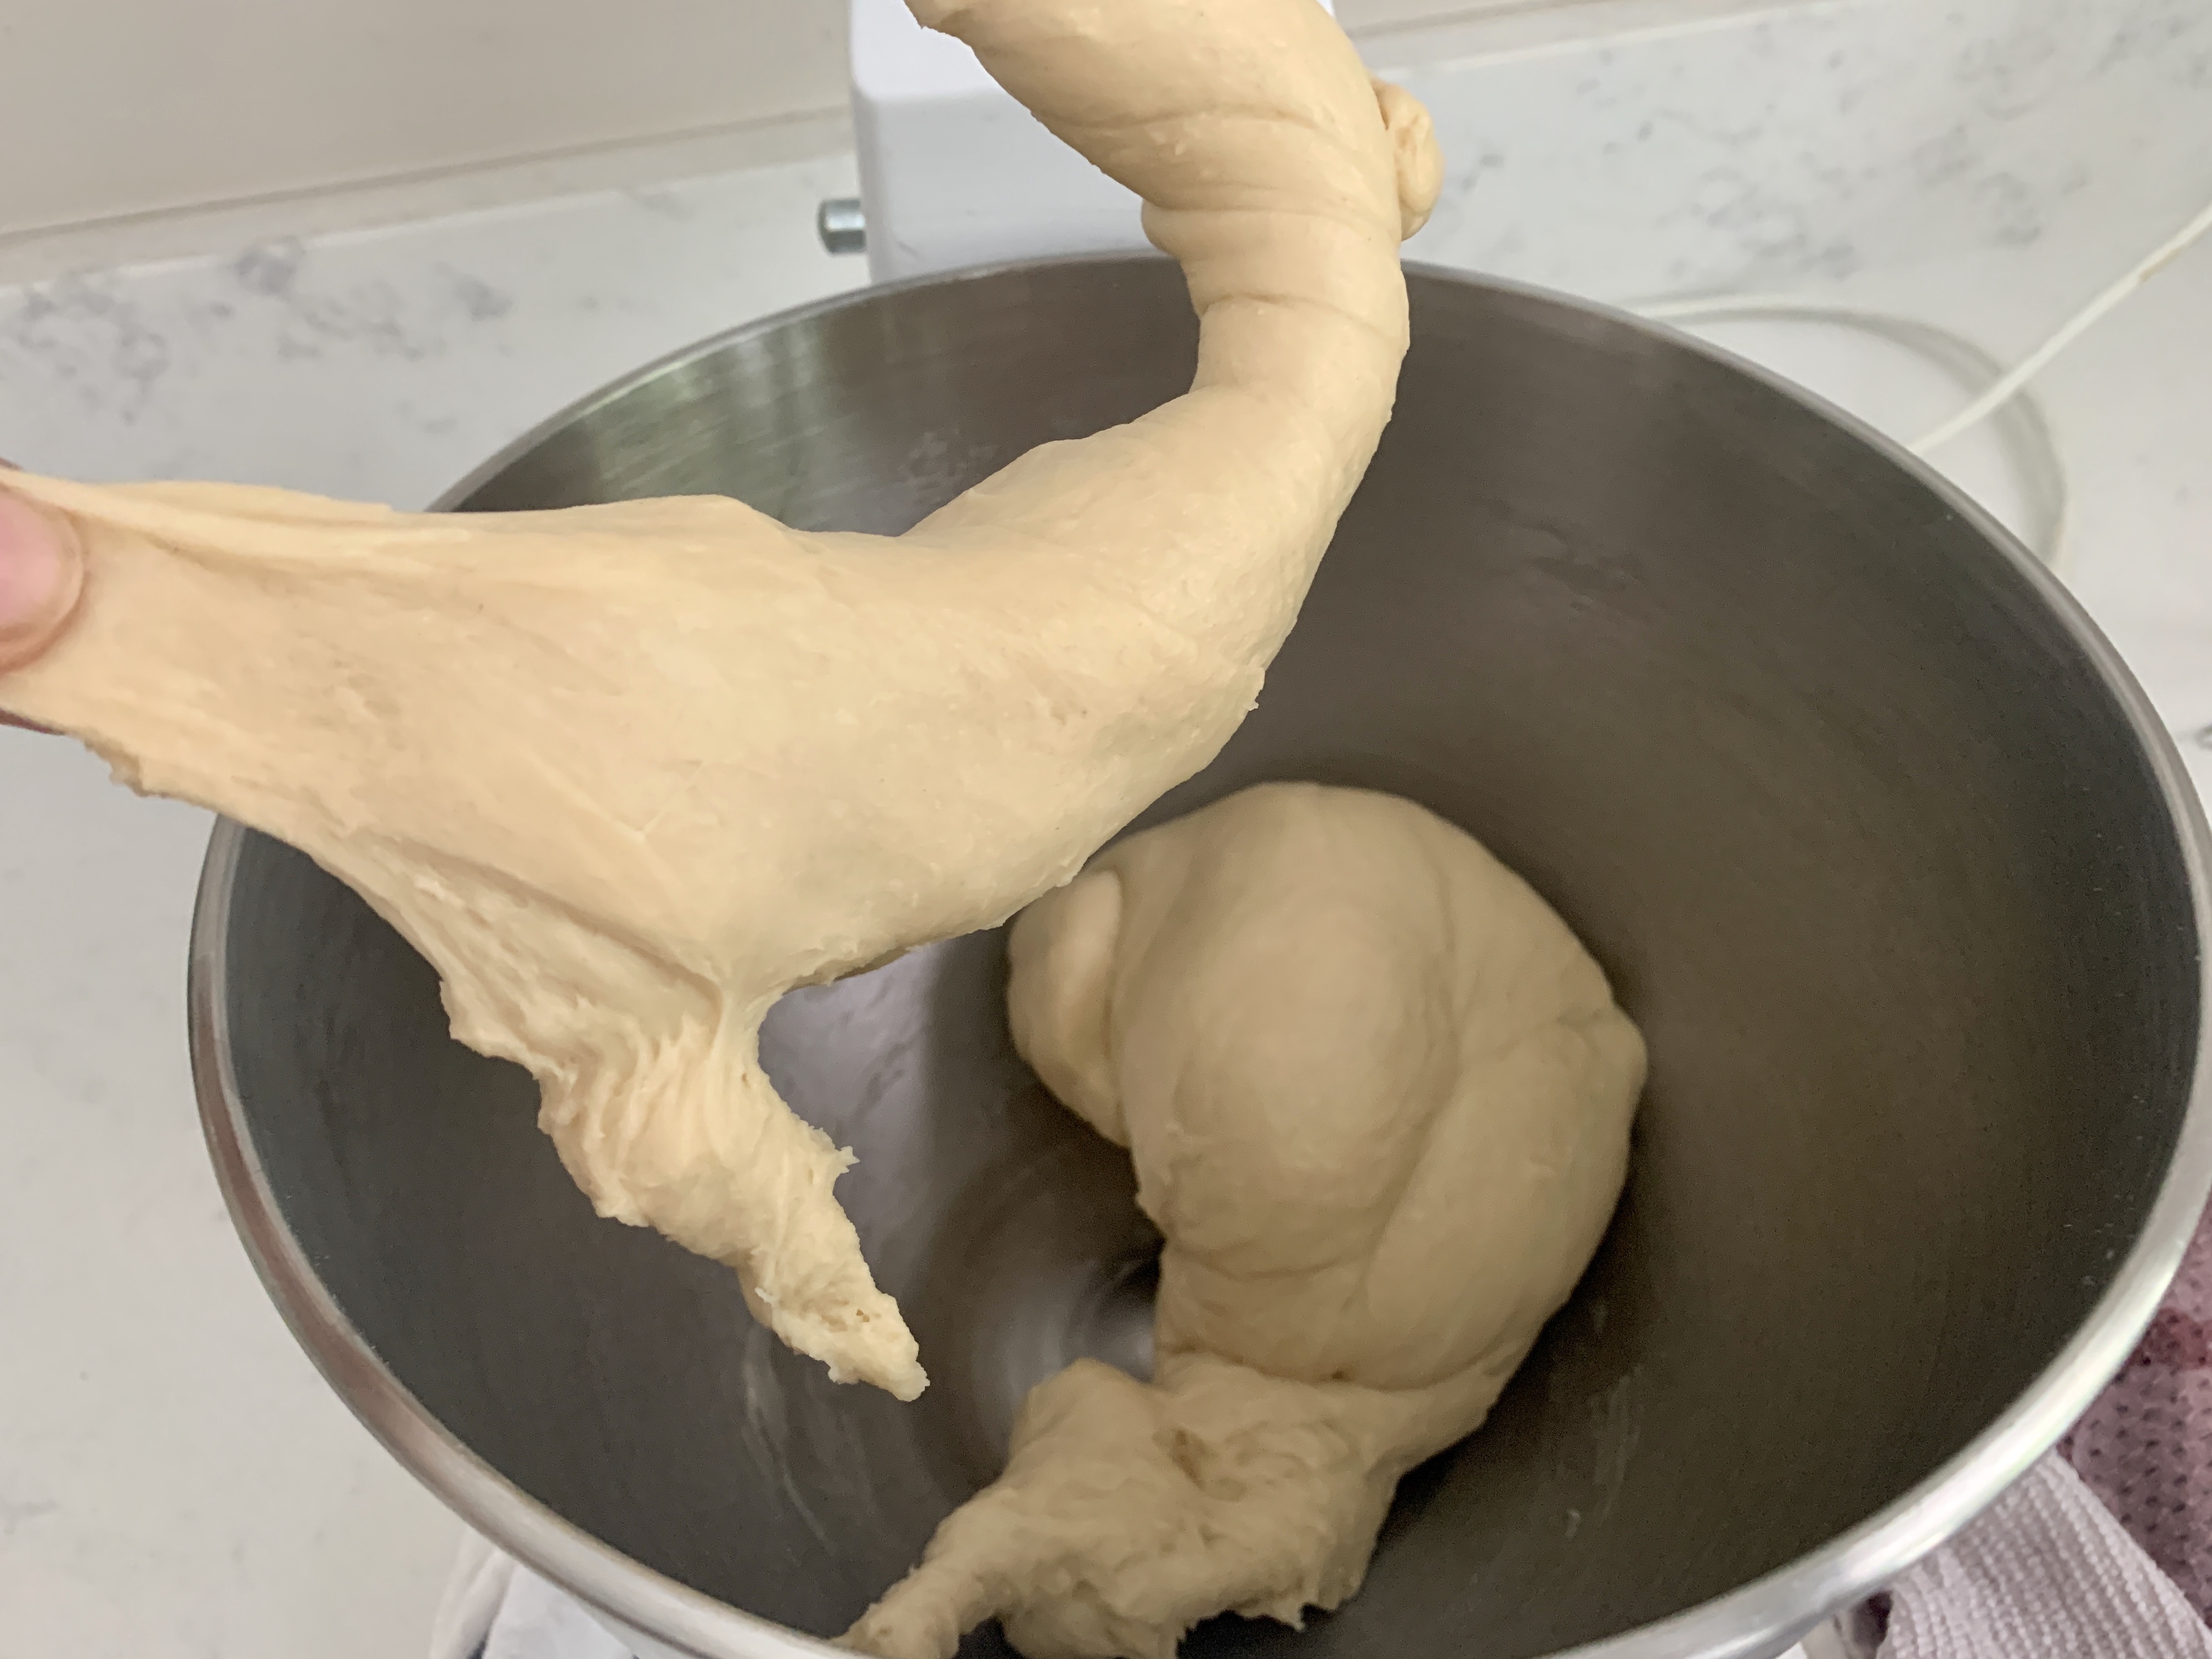
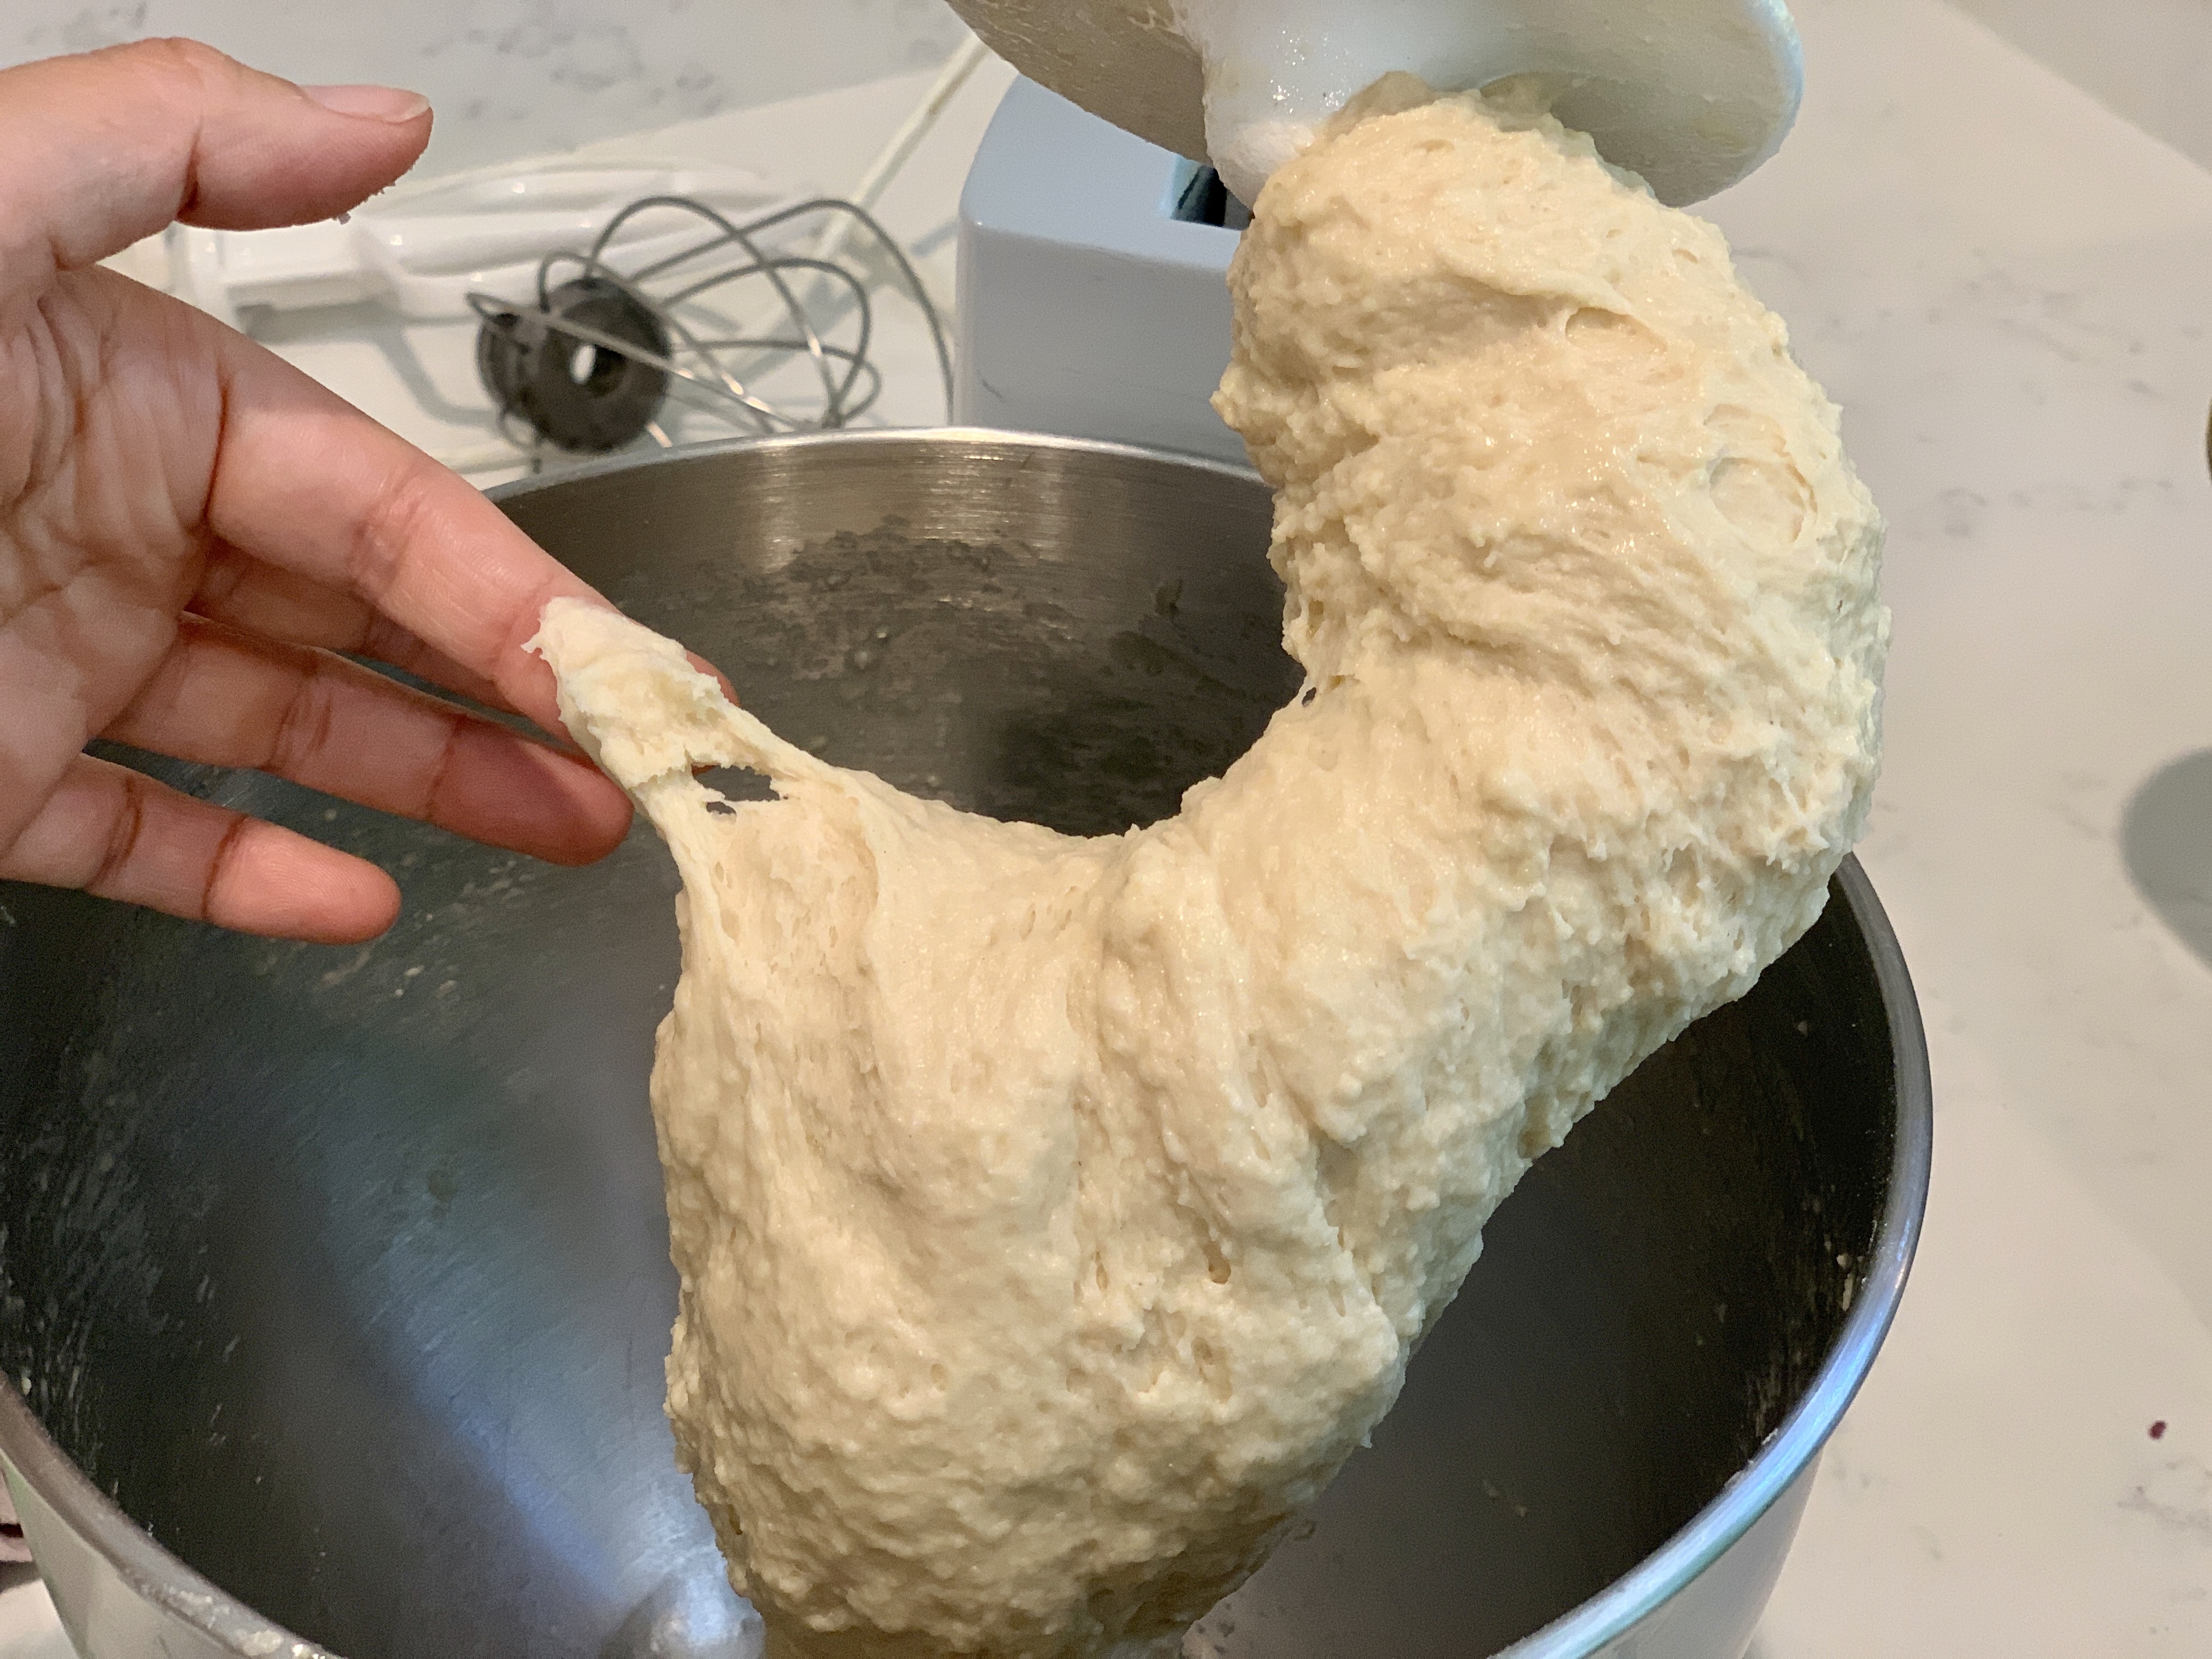
Turn the setting to medium or #4 for Kitchenaid and knead the dough for 7-8 minutes for a total of 10 minutes or until the dough is smooth and elastic. (It’s important to go by the texture of the dough over the estimated timing.)
at 5 minutes

at 10 minutes
Grease another bowl and spray your hands with cooking spray. This will make it so that the dough doesn’t stick to your hands.
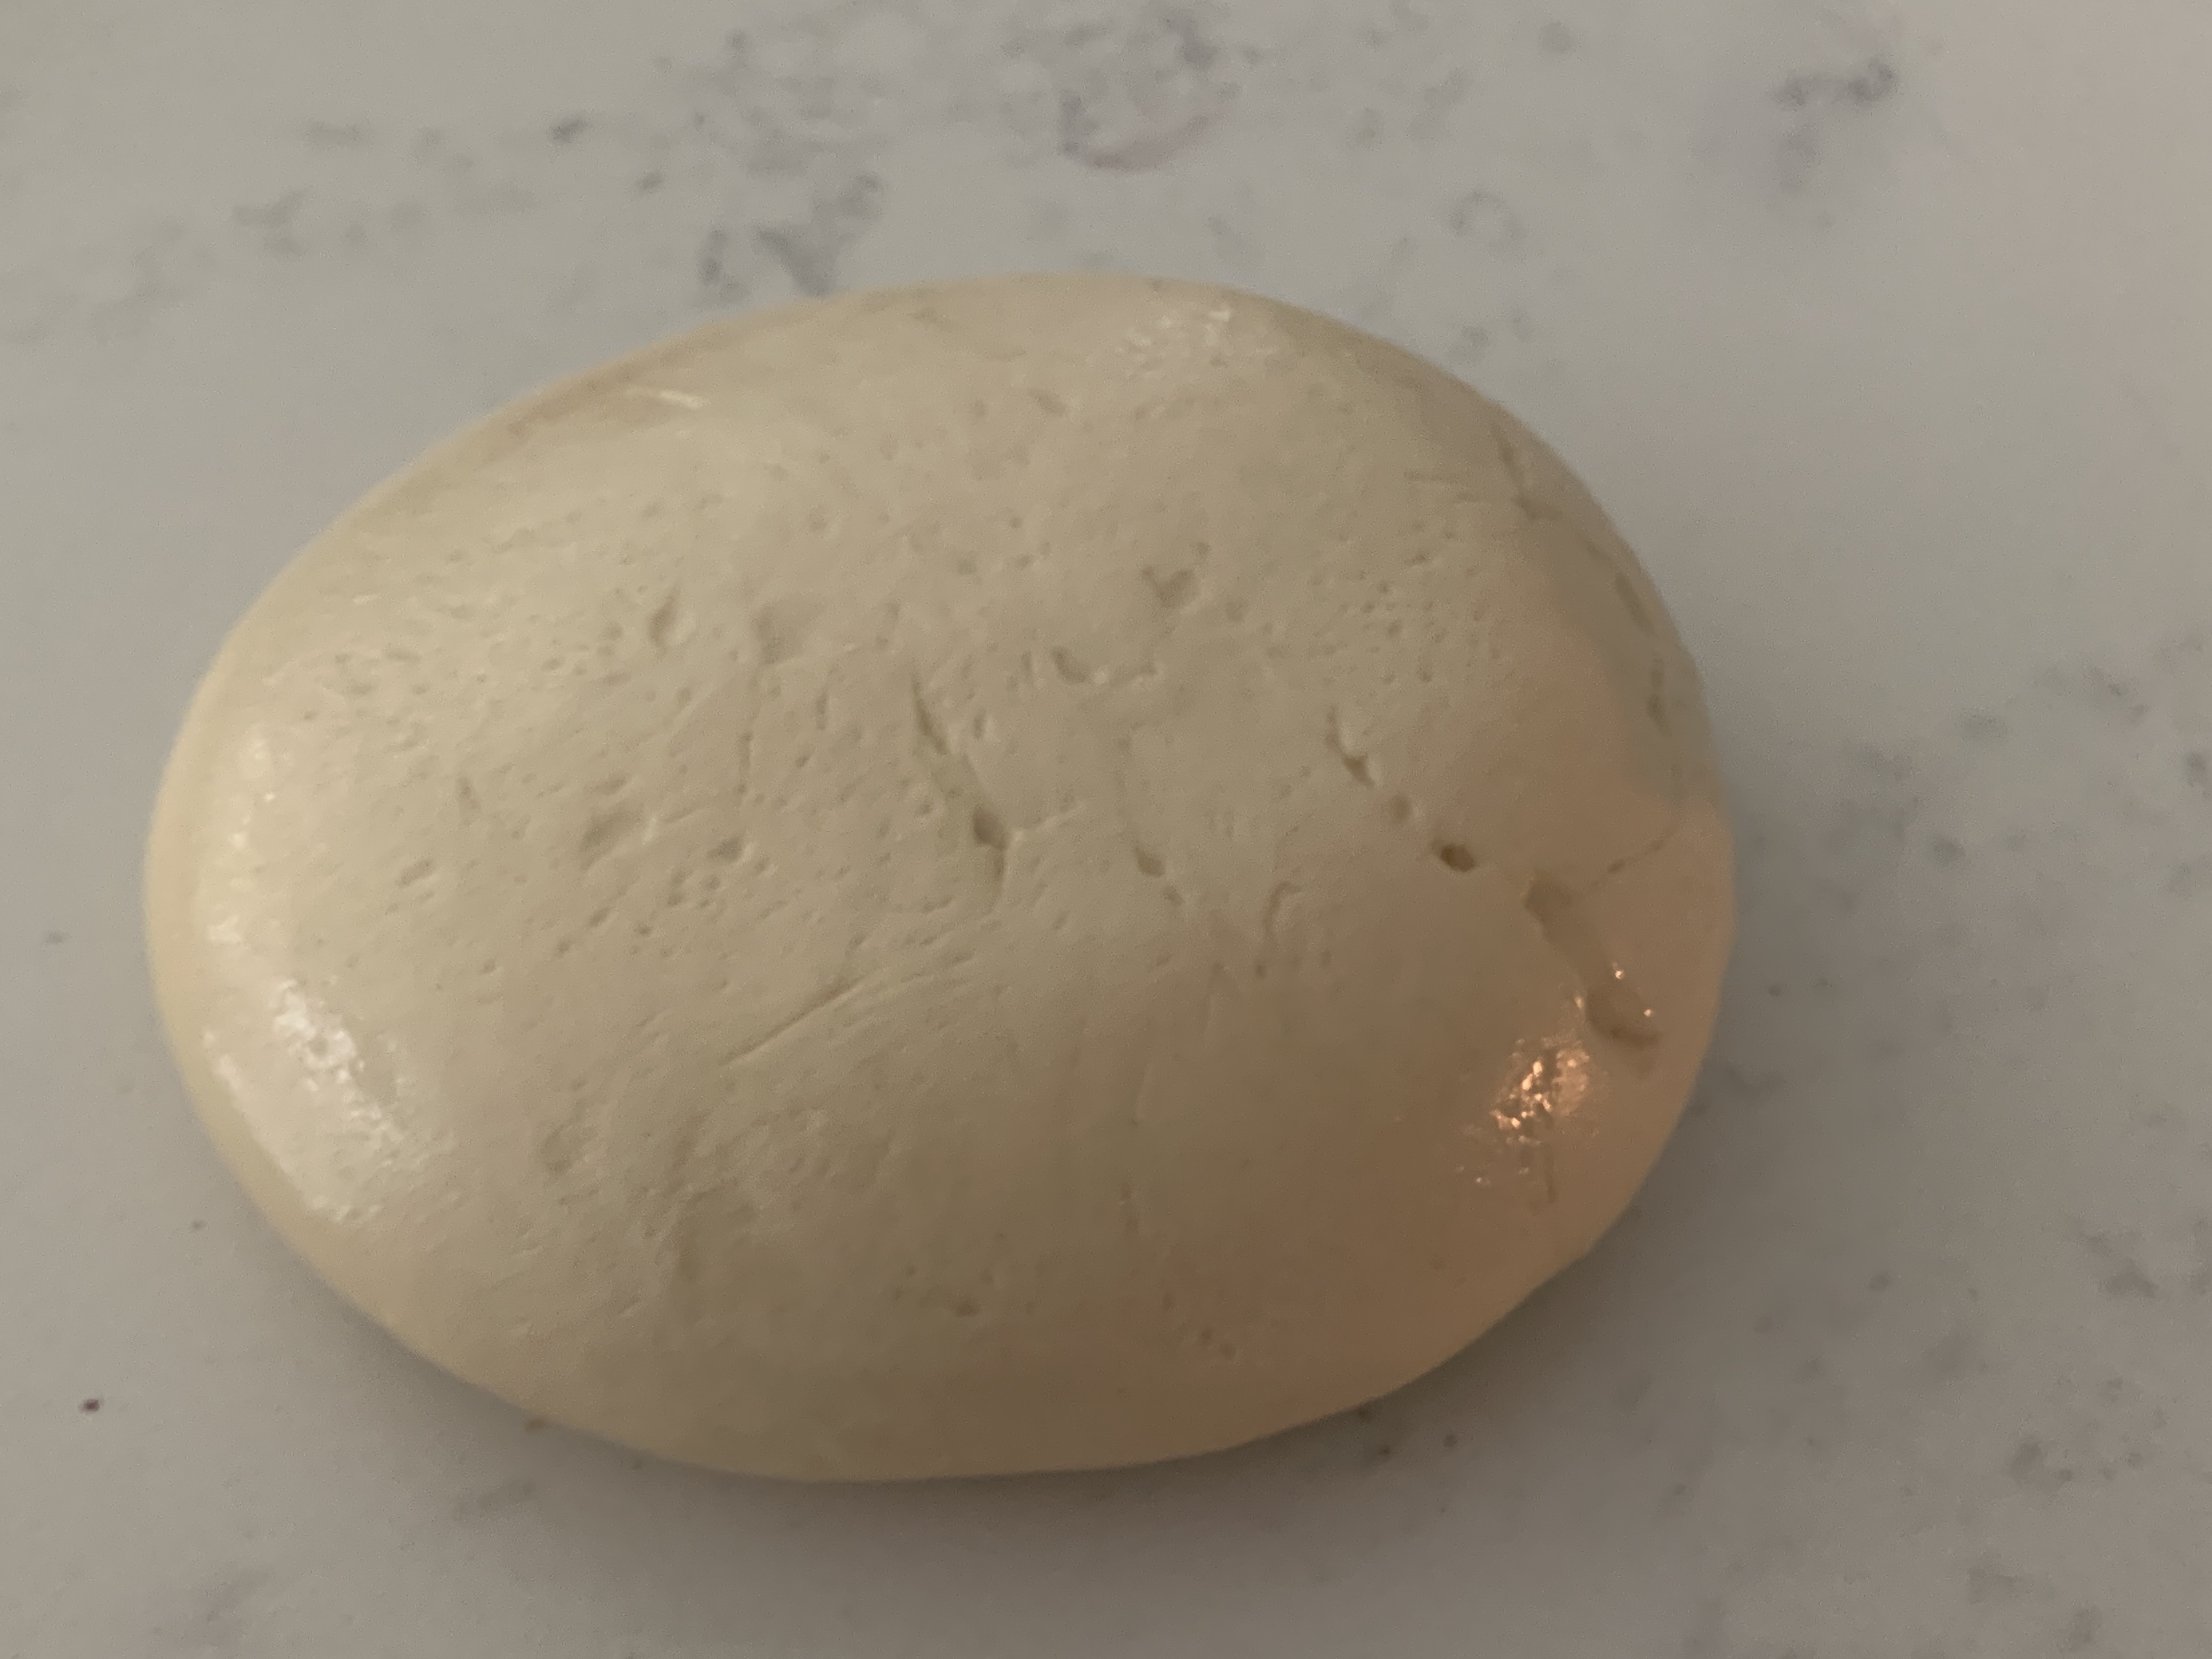
Remove the dough from the mixer and form into a ball. You can do this by pulling the sides under and sealing the edges. Do this a few times until it forms into a smooth ball.


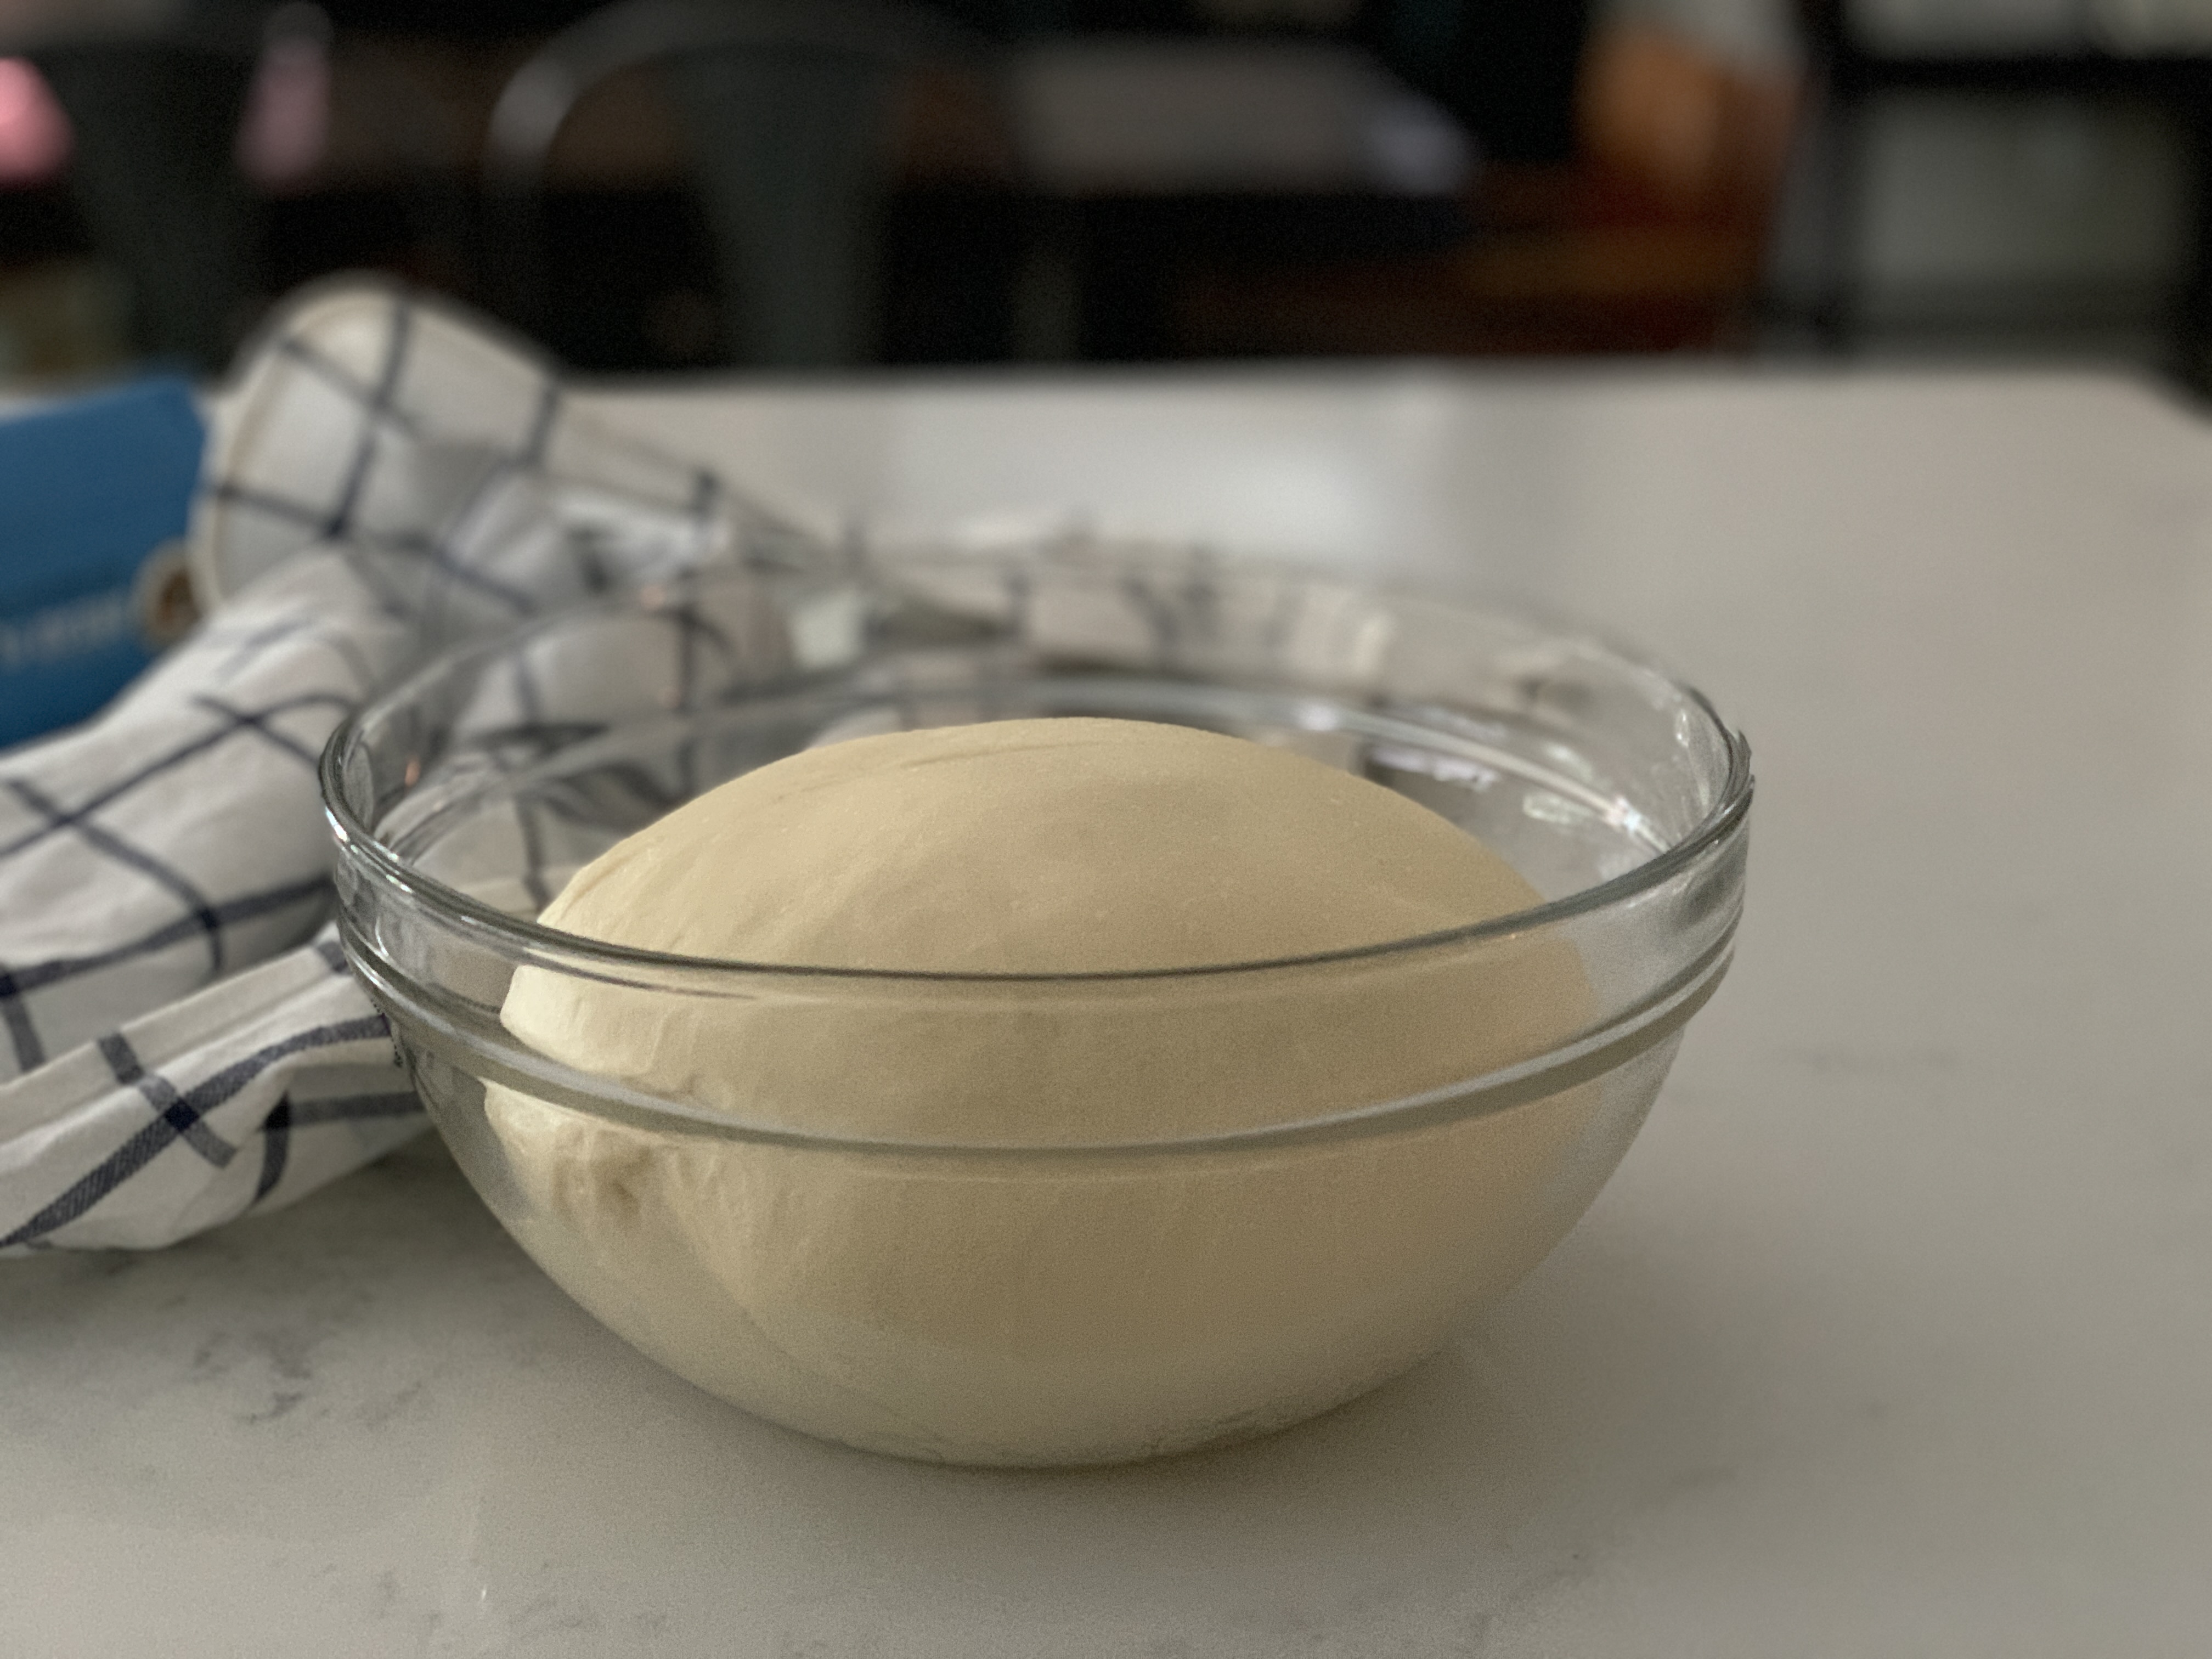
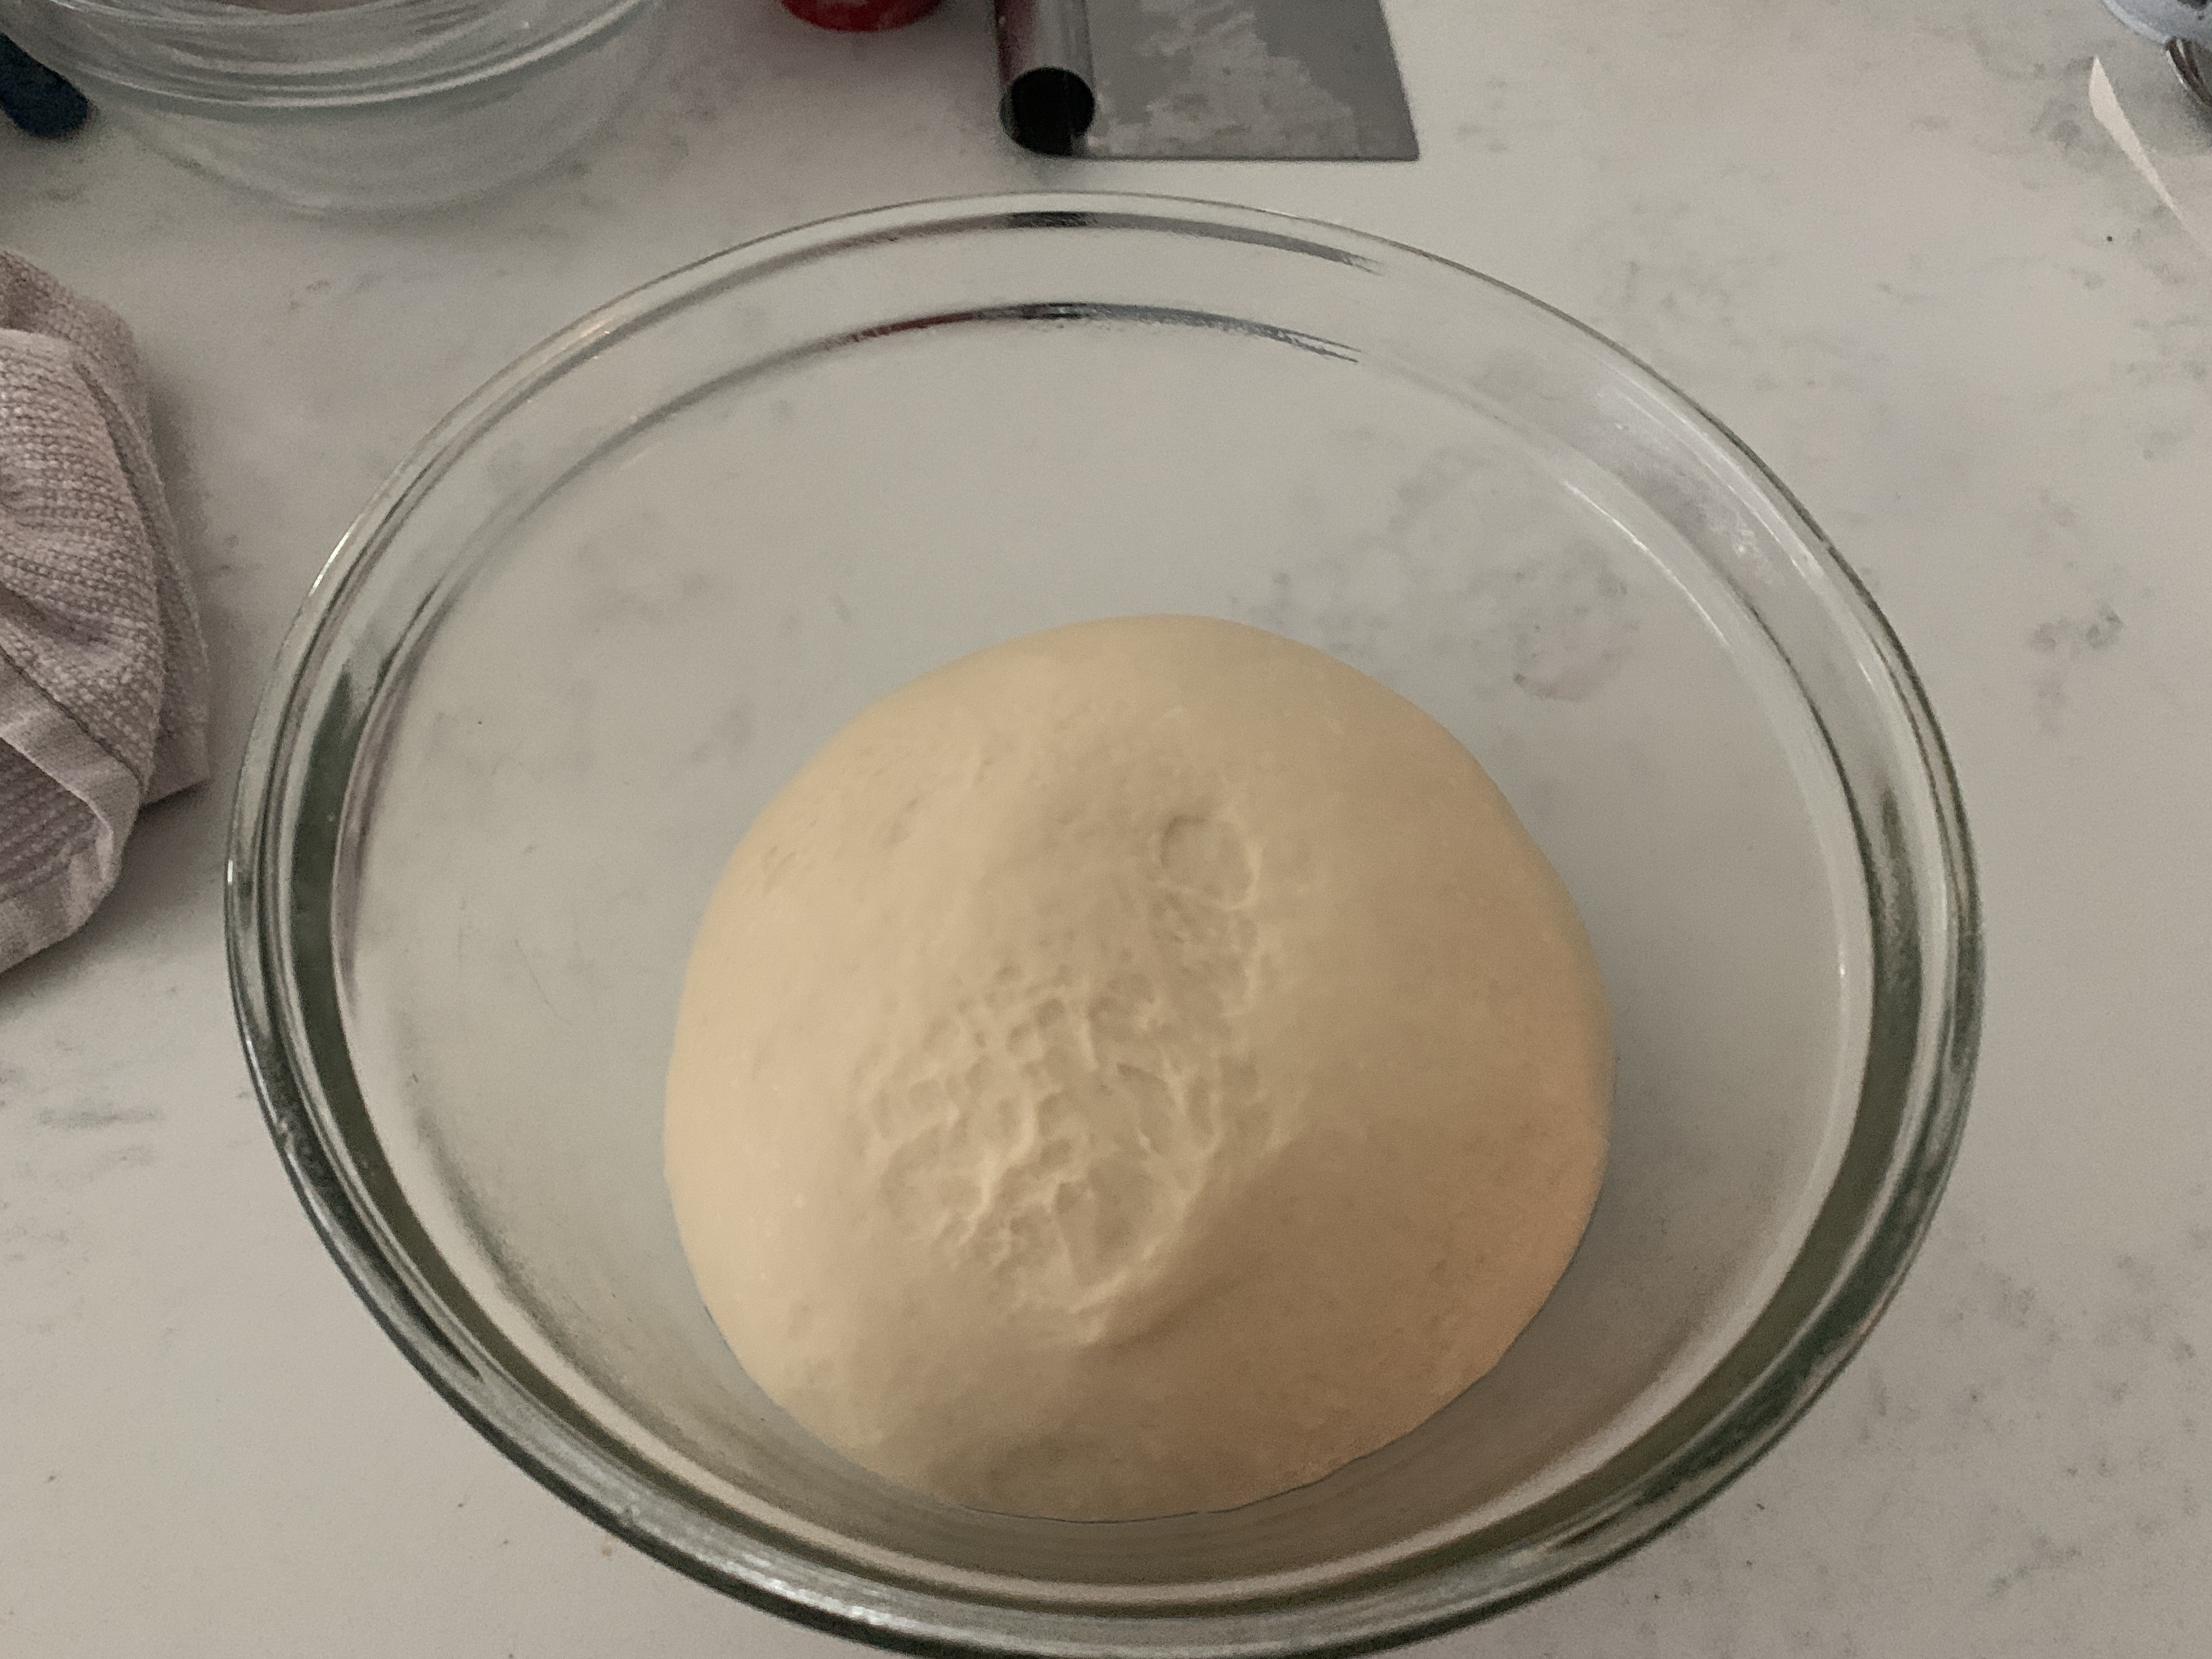
Let the dough proof in the greased bowl covered with a kitchen towel or plastic for 1 hour or until it doubles in size. I put mine in the oven so the temperature is usually mid to high 70Fs.
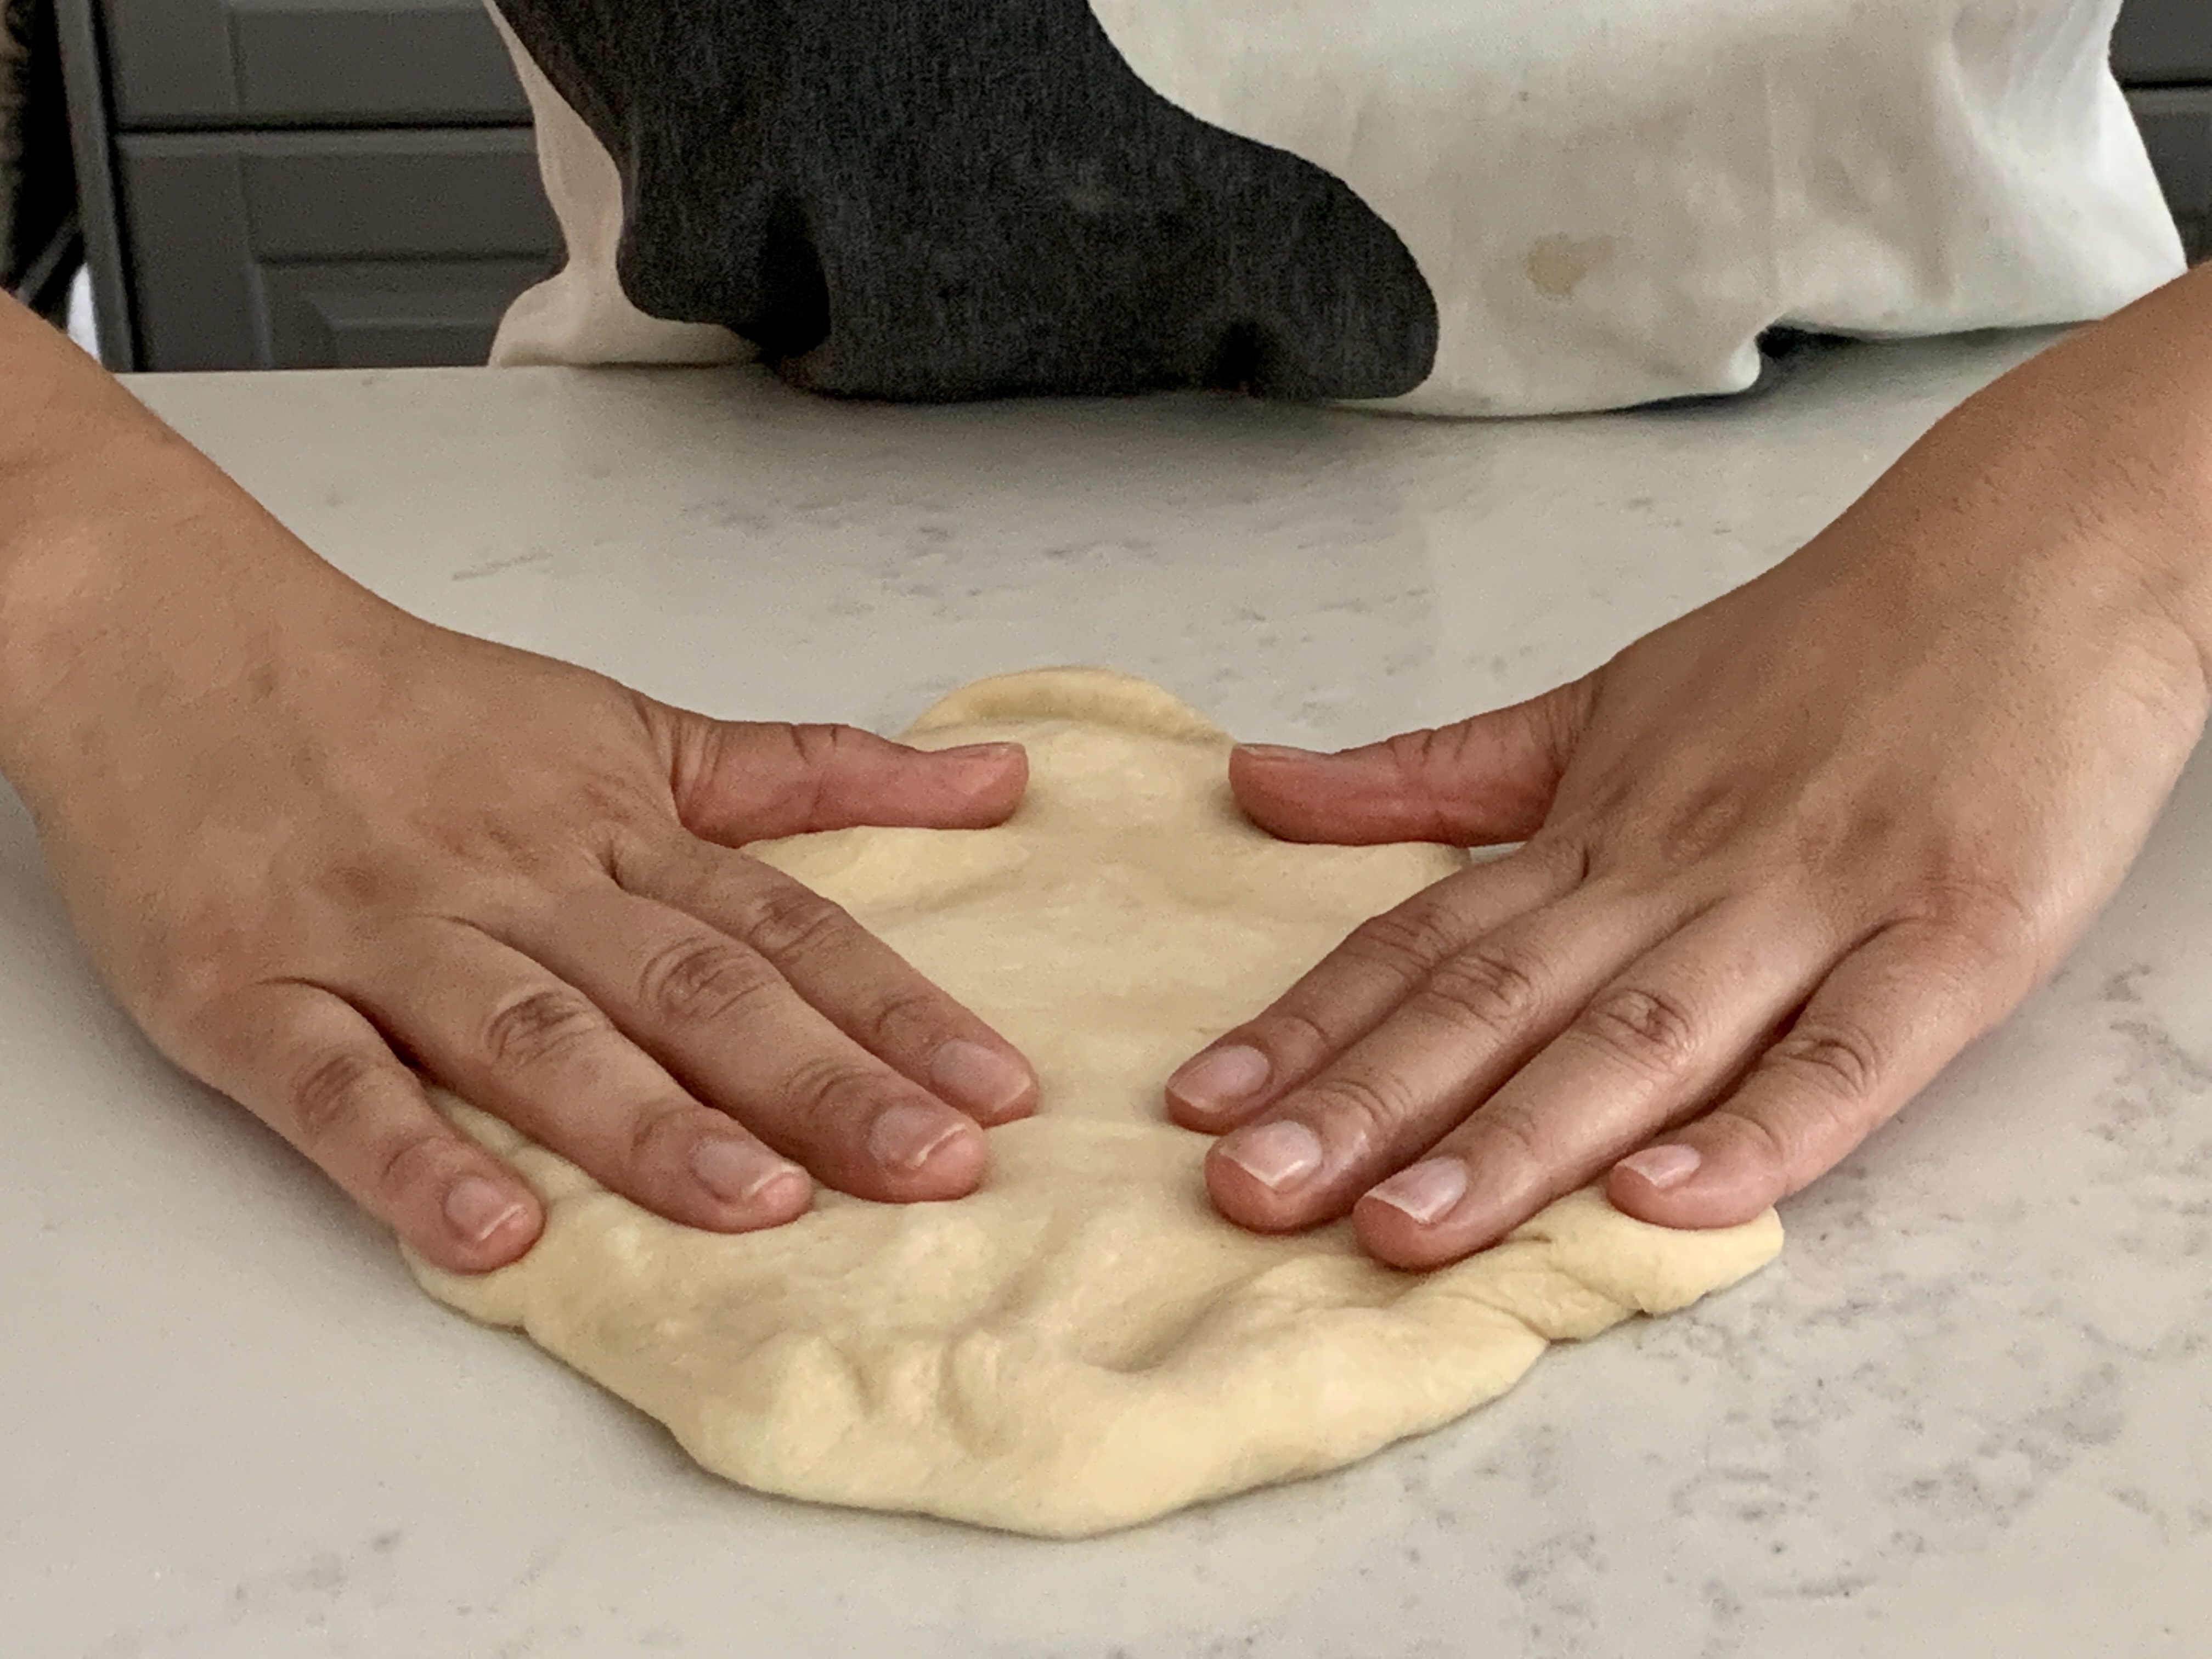
After 1 hour, take out the dough and place it smooth side down on a work surface. I spray my work area with PAM so the dough doesn’t stick. Knead for 1 minute to remove excess air.
Divide the dough equally into 12 pieces. Form each piece into a ball and roll in sesame seeds. Let it rest covered for 20 minutes.


- Press the wet side inward and press to seal.
- Repeat until you have a smooth ball.
- This takes 2-3x.
After 20 minutes, heat up approximately 1 quart of oil to 350F to 375F (use medium heat). Depending on the size of your pot, you will need to make sure that there are at least 2 inches of oil otherwise you will not be able to fry the donuts properly.

While the oil heats up, use a rolling pin and flatten each dough ball into a disk with 1/8th inch thickness. Cover the disk while working on the next ball.

Fry the dough when the oil temperature reaches between 350F-375F.
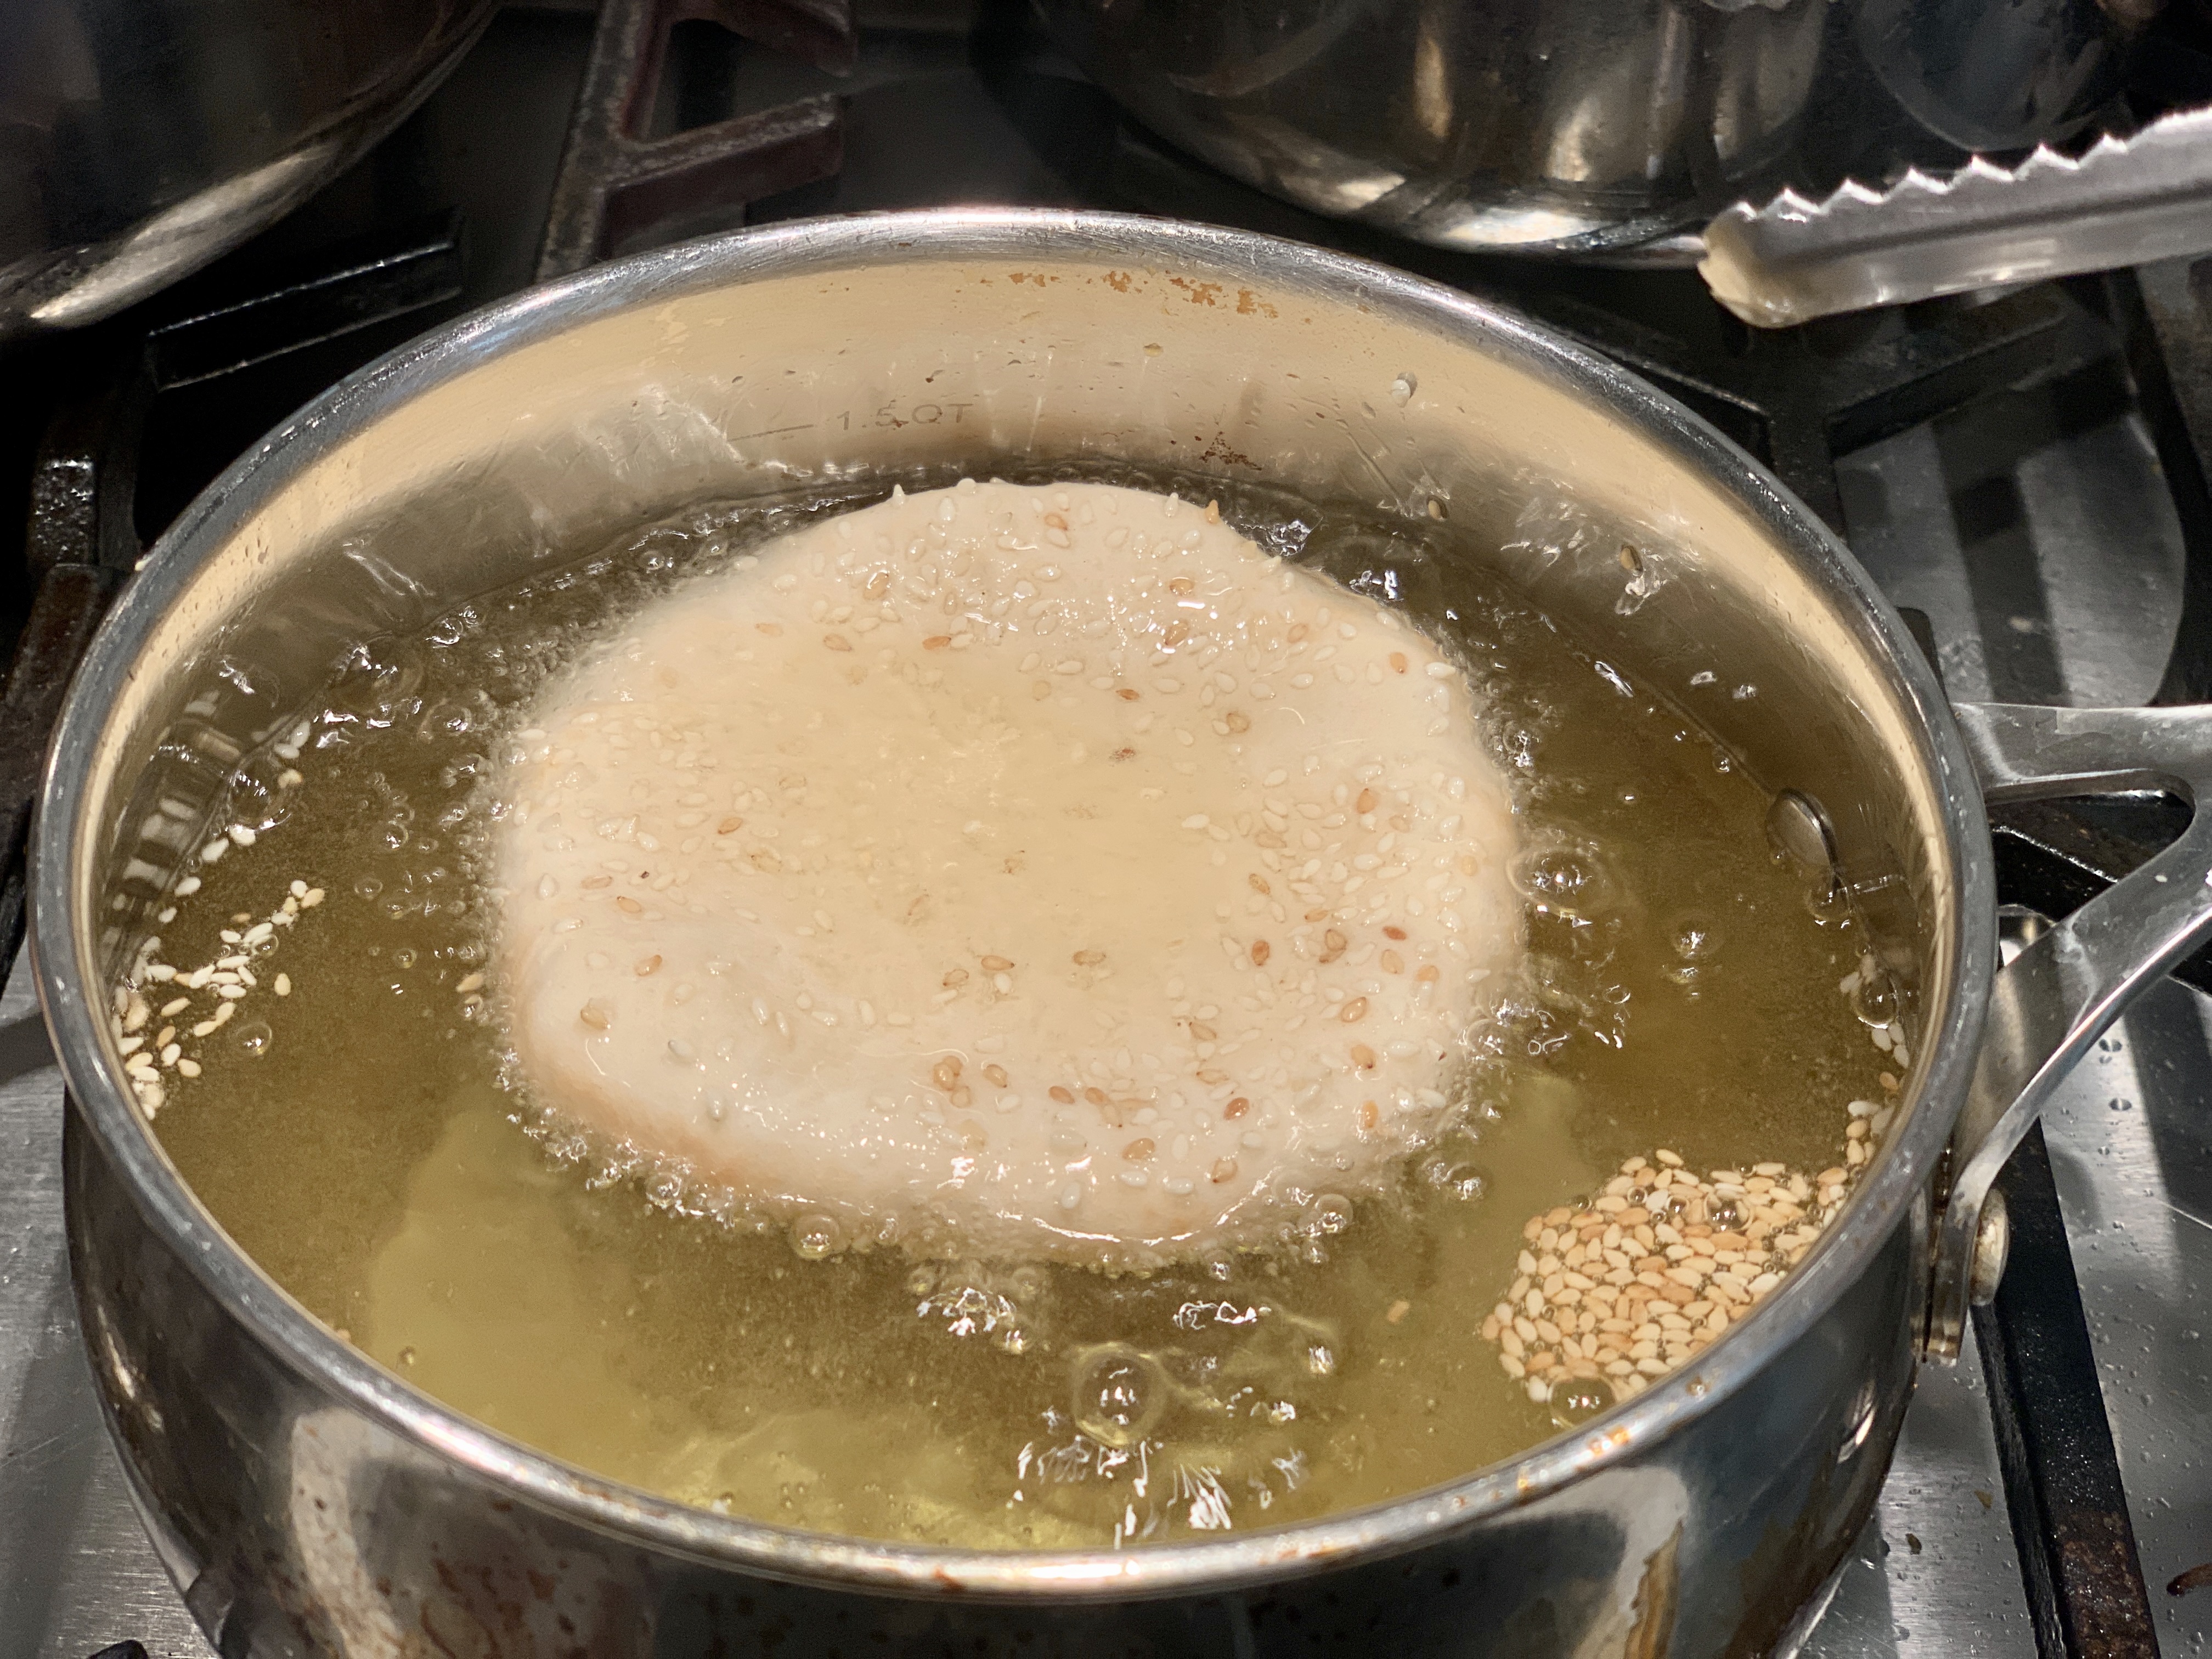
- Carefully slide the donut into the oil from the side so it doesn’t splash you.
- It will take a few seconds for the donut to rise to the top. Count to 5 and flip over. You can use tongs to maneuver the dough. Be careful not to press into the dough so it doesn’t deflate while cooking.
- Continue to count to 5 for each side and flip until the donut puffs up and turns golden brown. It will take approximately a minute for each donut so be careful not to burn it.
Remove from the oil and rest on some paper towel to absorb the excess oil. Brush the honey glaze on one side of the donut. Serve warm.

Why doesn’t my donut puff up?
- The first one will likely be a “throwaway’.
- The yeast was not good. Sometimes your yeast may be old or just ineffective. This is why we activated the yeast first to check before adding to the dough mix.
- You did not proof the dough enough so that it had time to rise and rest.
- If it takes you a long time to heat up the frying oil or to flatten the dough so that each disk slowly shrinks back and becomes thicker. Flatten out the dough again to 1/8th inch thickness before frying.
- Make sure your temperature stays around 350-375F by adjusting the heat to medium-low if your donuts start to darken too quickly.

For more recipes, visit our EAT page or Recipe Index.
Author: Chau Hoang
Photo Editing: Kevin Nguyen (https://www.kevwin.com/)