
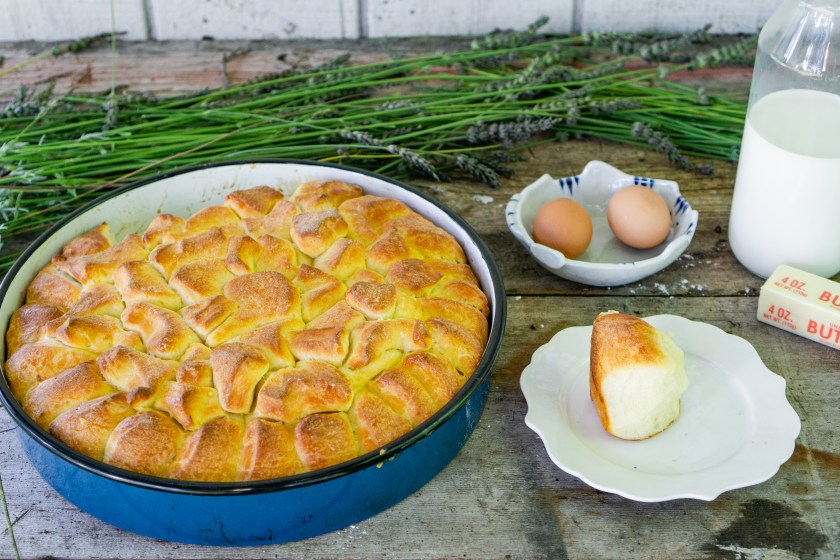
Bosnians love their breads and can’t have a meal without it. As such, it is not surprising to see the variety of breads available from the region. I heard that Sefira’s in-laws, Azra, makes the best pogača, a traditional bread that is similar to focaccia. On one Sunday, Azra came over and taught us how to make pogača from scratch. The texture is crusty on the outside and fluffy like a pillow inside and it’s absolutely tasty. This bread is best served warm right from the oven.
Serving size: 6 servings / Difficulty: Easy / Time: 3 hours total – 30 minutes of prep time, 2 hours of rest time and 30 minutes of baking time
Ingredients:
925 grams / 6 cups of All Purpose Flour
3 tablespoons of unsalted butter
3 eggs + 1 egg for egg wash
3 teaspoons of instant yeast
600 ml of lukewarm milk
1 tablespoon of salt
1 teaspoon of sugar
Equipment:
A large deep baking dish. I used a 12.5 inch circular baking dish for this recipe. You can also split the dough into 2 baking dish if you do not have a large one.
Optional: A mixer with a dough hook.

Directions:
Mix 3 teaspoons of instant yeast with 600ml of lukewarm milk. Cover with plastic wrap and set it aside for 5 minutes.

A. If mixing by hand:
In a large mixing bowl, mix 925 grams or 6 cups of all purpose flour, 1 tablespoon of salt, 1 teaspoon of sugar and 3 eggs beaten. While mixing the dough with your hand, pour in the milk slowly. Mix until the dough starts to come together and then you can dump the dough onto a floured surface to make it easier to knead. Knead the dough until you can form a smooth ball.
Depending on the humidity and temperature in the kitchen, you may need to add one to five tablespoons of flour, one at a time, as you knead to help it come together. The dough should still be sticky but manageable.
Coat a clean mixing bowl with olive oil and place the dough into the bowl for proofing. Cover with plastic wrap or kitchen towel and place in a warm spot for 2 hours or until dough has doubled in size.


B. Using a stand mixer like a Kitchen Aid (“KA”):
Mix 925 grams or 6 cups of all purpose flour, 1 tablespoon of salt, and 1 teaspoon of sugar in the mixing bowl. Turn the stand mixer to stir setting (KA #2) and add 1 egg at a time. Next slowly pour in the milk.

When the dough starts to form, turn the mixer to medium (KA#4) and let it knead for approximately 5 minutes. If the dough is still wet and has not pulled completely away from the side of the mixer, you can add a tablespoon of flour at a time and continue mixing for another minute, and check on the dough again. Depending on the humidity and temperature in your kitchen, you may need to add between one to five tablespoons of flour for the dough to pull away from the side of the bowl. The dough should still be slightly wet and sticky, but manageable. Total mixing time will be approximately 10 minutes.
Placed the slightly wet dough onto a floured surface and knead for approximatley 1 minute until you can form a smooth ball.
Coat a clean mixing bowl with olive oil and place the dough into the bowl for proofing. Cover with plastic wrap or kitchen towel and place in a warm spot for 2 hours or until dough has doubled in size.
C. After proofing period:
Preheat the oven for 400F.
Remove the dough onto a lightly floured surface. Knead the dough again to form into a ball. This should take approximately a few minutes. Split the dough into two halves to make it more manageable to work with. Cover the dough that you are not working with plastic wrap to prevent it from drying out.


Flatten the dough with a rolling pin until you reach 1/2-inch thickness.


Melt 3 tablespoons of unsalted butter on the stove on low heat or in the microwave. Brush onto the dough.

Using a ring mold, cut out semi-circles.

Stack them onto a deep baking pan so that each dough piece overlap each other. Beat 1 egg to create egg wash and lightly brush over the dough.


Bake for approximately 30 minutes or until you can insert and remove a toothpick cleanly.
This bread is best served right out of the oven.


For more recipes, visit our EAT page or Recipe Index.

Odlican recept. Great recipe
LikeLike